Better code history with gitlinter / commitlinter

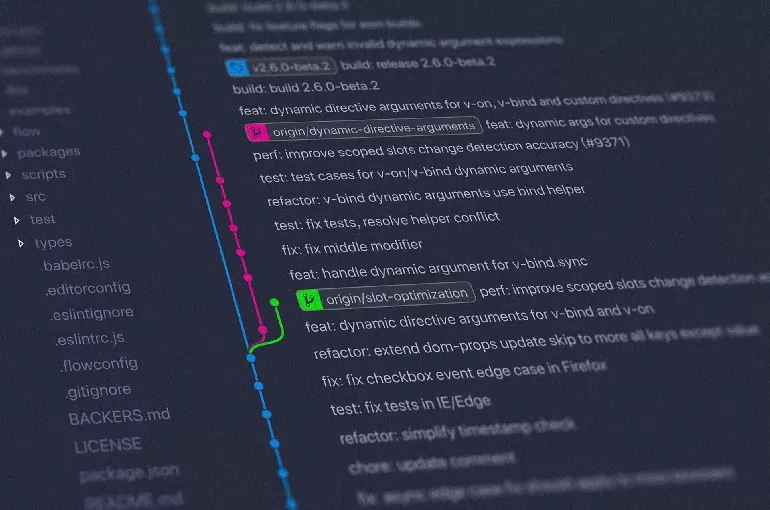
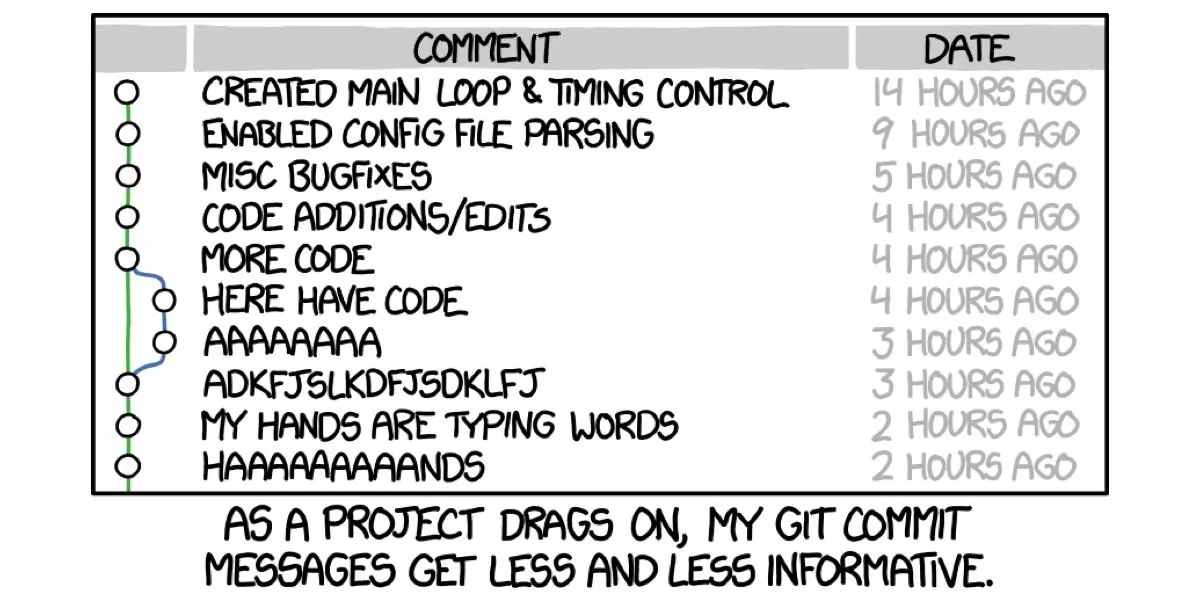
Working with git (or a similar version control system) is not an essential part of coding. We do frequent code commits as part of our workflow. Every developer has their own way of committing their code and labeling the changes made in the commit with commit messages. We often do this without putting enough thought into our commit messages that essentially define our change log in a more readable way when we look in the history of changes.

Photo by Yancy Min on Unsplash

We need better commit messages

This brings us why having consistent, concise, and easier to follow commit messages very important. Better commit messages will make your code history, easy to follow, and navigate in the event to understand what happened when. In some cases, we want to use these changelogs more formally for internal purposes or external use like public changelogs or release notes. There are even tools that help to automate / to generate changelogs from commit messages.

Source: xkcd

Better teamwork

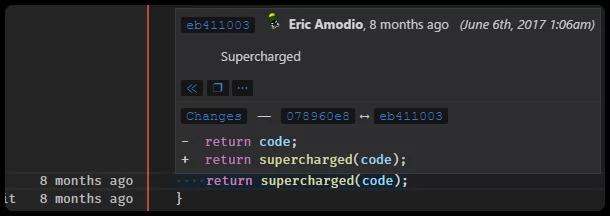
Working with multiple developers even as little as two developers on a project will require clear communication on the version control system. The commit messages do not only appear in the code history, but also in blame logs as well as in-IDE helper tools like git lens for Visual Studio Code when the last change was done on the particular line under the cursor, by who, and with which commit message. Features like these make the code writing experience much richer and passively collaborative between team members. So commit messages actually appear in different places in different ways.

How

Team should define clear set of commit message rules starting from their git flow. What I mean by that is how they do their branching, tagging strategy. This generally allows certain rules to be inherited to commit messages.

Regardless of the rules, people will forget. Easiest and best way to implement these rules to make sure there is a automated control mechanism that rejects/alerts if the commit message written is abiding these rules. “commitlinter” is a nicely designed npm package that is, when registered as a git pre-commit hook, checks the commit message and based on the commitlinter configuration, allows or rejects the commit if the commit message follows all the requirements or tell what’s going wrong with the commit message.

commitlinter comes with pre-defined conventions that are adapted by big companies/teams that are different in approach and have different focuses. 

https://www.conventionalcommits.org/en/v1.0.0/

I suggest you to review these different conventions and pick a convention that speaks closer to what you want to follow. And you can extend and customize its rules with your own approach.

At a high level, defining “scope” for your commit messages is the most critical categorization of the change content when commiting. An approach like the below is a good start:

  • feat: Add a new feature to the codebase (MINOR in semantic versioning).
  • fix: Fix a bug (equivalent to a PATCH in Semantic Versioning).
  • docs: Documentation changes.
  • style: Code style change (semicolon, indentation…).
  • refactor: Refactor code without changing public API.
  • perf: Update code performances.
  • test: Add a test to an existing feature.
  • chore: Update something without impacting the user (ex: bump a dependency in package.json).

We use a simplified version of this scope set. A sample commitlinter config file:

module.exports = {
	parserPreset: 'conventional-changelog-conventionalcommits',
	extends: ["@commitlint/config-conventional"],
	rules: {
		"type-enum": [
			2,
			"always",
			[
				"feat",
				"fix",
				"cont",
				"chore"
			]
		]
	}
};

See all rules in its official documentation: https://github.com/conventional-changelog/commitlint/blob/master/docs/reference-rules.md

commitlinter also can be configured with husky which is another npm package that handles git hook registration in npm install commands.

The combination of both projects in a NodeJS project will allow setting and configuring the hooks easily.

Change logs from commit messages

Conventional commit and commitlinter gets juicer when combined with an auto-generated changelog in a technical project – even for internal use cases. There are changelog generators from git-log that gives you conventional changelog which will be much more consistent throughout the team members who are making commits to a single repo as well as having well consistent updates in the commit messages.

Conventional changelog generators can translate each conventional commit spec to nicely categorized changelog in a simple configuration file like:

{
    "types": [
      {"type": "feat", "section": "Features"},
      {"type": "fix", "section": "Bug Fixes"},
      {"type": "chore", "hidden": true},
      {"type": "docs", "hidden": true},
      {"type": "style", "hidden": true},
      {"type": "refactor", "hidden": true},
      {"type": "perf", "hidden": true},
      {"type": "test", "hidden": true}
    ],
    "commitUrlFormat": "https://github.com/mokkapps/changelog-generator-demo/commits/{{hash}}",
    "compareUrlFormat": "https://github.com/mokkapps/changelog-generator-demo/compare/{{previousTag}}...{{currentTag}}"
  }

That generates a nicely organized markdown or HTML document. AngularJS is one of the known project utilized conventional commit messages and conventional changelog. See their changelog for an example of this; https://github.com/angular/angular/blob/master/CHANGELOG.md

Happy conventional commits…

Using Cloudinary for image cloud storage with image transformations in your NodeJS express app in Heroku

Here we are with another article about the development aspect of photo/image management (storage, serving, retrieval). I’ve previously (right before this article) wrote about Authenticating and Getting Instagram Photos in NodeJS/Express application. This story is about manually storing, handling upload, download and serving static photo/image using a CDN service called Cloudinary.

Content should be separate than the application

We’re (web/back-end/front-end developers) building apps, sites in many different ways (different platforms, languages, stack). One thing very common and old school is that everything on the site is organized in the same bucket. So when we code and deploy a site, it’s HTML, CSS, back-end code, images, videos, fonts, etc… all in the same place. Now we have distributed deployment systems with having multiple instances of our application on different web servers too. Which made us do a soft transition to keep common files (that can be changed) like uploads folders in block storages like s3 or azure blob… But it still doesn’t do the full justice that both static and dynamic content of an application/website should be completely separated than the application code. This is not a new practice but it’s a practice that can be missed so easily.

It’s so easy to leave an image that is used in a blog post within the codebase (which is wrong). A static content that will not be used to render your page on the back-end ideally doesn’t belong to the place where you store your application (code). Yet, it shouldn’t be served (or requested) from the same servers which are responsible (only should be responsible) for rendering and serving your pages. Tiring your web server with serving images or compiled CSS is not optimal. This will also affect your site’s performance that everything is coming from the same source. Having distributed sources will make your browser to manage parallel downloads of your site’s resources faster. No brainer!

We’ll not get into the techniques of how to separate these different things in different places in this article, but we’ll talk about images specifically.

Images need a big brother

This was a novelty in the past where we wanted to have multiple sizes of an image/photo so we can economically request the right size in different pages – example: get 100px width thumbnail in the page where we show photos in a grid, show the 500px width version on the lightbox, and link out to the original photo in the “download” button. This makes total sense right? Strategizing how to have the different versions ready on your server (or CDN) is another thing. So many self-solutions you can use or code it up. But from user experience (admin/editor) standpoint, nobody wants to do this manually or even automatically but wait for the server to resize and prepare these versions when uploading a single photo to your CMS/app/back-end. To me, that is a one-way road. I only want to upload an image and only wait the time takes the file transfer from my device to the server. Done!

What is Cloudinary and should I use it?

Cloudinary is that big brother and storage and server together. Smart CDN for images and videos. It has a pretty decent free package that will be enough for almost all personal, experimental and small projects. If you have decent size traffic, you may think to pay or optimize your solution with Cloudinary.

Cloudinary hosts and serves images for you. It’ll be your storage bucket that also has many out of box solutions for known CMSs like WordPress. I like the API/SDK route which they have SDKs and well-designed API for almost all platforms. We’ll play with NodeJS below.

The magic cloudinary has that is compelling that it can do so many varieties of transformations on your images on the fly (and caches them). Basic things like color filters, crop, resize, rotate etc… But the real thing is where they have face recognization that you can create square avatars with intelligently telling cloudinary to give you the face focused position in the center on your circle avatar with transparent png background and have 2px border around circle cropped avatar. All of it happens over URL parameters. True magic. I haven’t digg the video side of this but I read bunch of smart stuff on the streaming site which is also worth considering cloudinary as one-stop-shop for visual static assets.

Add Cloudinary service on your heroku application

Adding a service to heroku application is very easy and mostly done in command line. In order to create a new cloduinary service as add-on to your application, in your application folder run:

heroku addons:create cloudinary:starter

This command will create a new cloudinary account linked to your heroku account and add cloduinary credentials to your heroku config – environment variables. You can see and copy the variables to your local .env file with

heroku config

Using it on nodejs/express app

Install first:

npm install --save express body-parser path multer cloudinary

server.js

https://gist.github.com/mfyz/1f3628acde30375b7b7fed04ed4a904e.js

See this example on github: https://github.com/mfyz/heroku-cloudinary-uploads-example

WordPress and other sites

Cloudinary has SDKs and official plugins to well-accepted platforms like WordPress. Check out their official documentation about the ent libraries and plugins


You can also use my invitation link to give me extra free credits: https://cloudinary.com/invites/lpov9zyyucivvxsnalc5/cdlhm6z9q63gdufko1kj

Analytics Data on SQL Database – Best database and table design for billions of rows of data

This is not an article that I am writing but I’m mostly quoting a great gem on a stack overflow answer I came across when I was researching a DIY way to store and create analytics reports for a small to medium size project. The project’s type doesn’t matter because this is a generic problem and great solution.

Why not use analytics tools/services?

I am in constant search of the better alternatives or simpler versions of the solutions we use at my team. We certainly use many services and tools from open source to licensed software. But I still choose to understand, know and be able to apply these solutions by myself on a custom solution where I have full control over the data, output and user experience.

So I casually read and research how others approach the issues or queries wander in my mind.

Then I stumbled upon this stack overflow thread with a brilliant answer that contains steps to try out from scratch that I suggest any engineer to just try and play on their own time.

PostgreSQL and BRIN indexes

To create a sample table with 1.7 billion rows of a sample sensor data (temperature read from the sensor with timestamps in the logs):

EXPLAIN ANALYZE
CREATE TABLE electrothingy
AS
  SELECT
    x::int AS id,
    (x::int % 20000)::int AS locid,  -- fake location ids in the range of 1-20000
    now() AS tsin,                   -- static timestmap
    97.5::numeric(5,2) AS temp,      -- static temp
    x::int AS usage                  -- usage the same as id not sure what we want here.
  FROM generate_series(1,1728000000) -- for 1.7 billion rows
    AS gs(x);

                             QUERY PLAN                              
--------------------------------------------------------------------
 Function Scan on generate_series gs  (cost=0.00..15.00 rows=1000 width=4) (actual time=173119.796..750391.668 rows=1728000000 loops=1)
 Planning time: 0.099 ms
 Execution time: 1343954.446 ms
(3 rows)

So it took 22min to create the table. Largely, because the table is a modest 97GB. Next, we create the indexes,

CREATE INDEX ON electrothingy USING brin (tsin);
CREATE INDEX ON electrothingy USING brin (id);    
VACUUM ANALYZE electrothingy;

It took a good long while to create the indexes too. Though because they’re BRIN they’re only 2-3 MB and they store easily in ram. Reading 96 GB isn’t instantaneous, but it’s not a real problem for my laptop at your workload.

Now we query it.

EXPLAIN ANALYZE
SELECT max(temp)
FROM electrothingy
WHERE id BETWEEN 1000000 AND 1001000;

                             QUERY PLAN                                                                  
--------------------------------------------------------------------
 Aggregate  (cost=5245.22..5245.23 rows=1 width=7) (actual time=42.317..42.317 rows=1 loops=1)
   ->  Bitmap Heap Scan on electrothingy  (cost=1282.17..5242.73 rows=993 width=7) (actual time=40.619..42.158 rows=1001 loops=1)
         Recheck Cond: ((id >= 1000000) AND (id <= 1001000))
         Rows Removed by Index Recheck: 16407
         Heap Blocks: lossy=128
         ->  Bitmap Index Scan on electrothingy_id_idx  (cost=0.00..1281.93 rows=993 width=0) (actual time=39.769..39.769 rows=1280 loops=1)
               Index Cond: ((id >= 1000000) AND (id <= 1001000))
 Planning time: 0.238 ms
 Execution time: 42.373 ms
(9 rows)

Update with timestamps

Here we generate a table with different timestamps in order to satisfy the request to index and search on a timestamp column, creation takes a bit longer because to_timestamp(int) is substantially more slow than now() (which is cached for the transaction)

EXPLAIN ANALYZE
CREATE TABLE electrothingy
AS
  SELECT
    x::int AS id,
    (x::int % 20000)::int AS locid,
    -- here we use to_timestamp rather than now(), we
    -- this calculates seconds since epoch using the gs(x) as the offset
    to_timestamp(x::int) AS tsin,
    97.5::numeric(5,2) AS temp,
    x::int AS usage
  FROM generate_series(1,1728000000)
    AS gs(x);

                             QUERY PLAN                                                                
--------------------------------------------------------------------
 Function Scan on generate_series gs  (cost=0.00..17.50 rows=1000 width=4) (actual time=176163.107..5891430.759 rows=1728000000 loops=1)
 Planning time: 0.607 ms
 Execution time: 7147449.908 ms
(3 rows)

Now we can run a query on a timestamp value instead,,

EXPLAIN ANALYZE
SELECT count(*), min(temp), max(temp)
FROM electrothingy WHERE tsin BETWEEN '1974-01-01' AND '1974-01-02';
                                                                        
                              QUERY PLAN                                                                         
--------------------------------------------------------------------
 Aggregate  (cost=296073.83..296073.84 rows=1 width=7) (actual time=83.243..83.243 rows=1 loops=1)
   ->  Bitmap Heap Scan on electrothingy  (cost=2460.86..295490.76 rows=77743 width=7) (actual time=41.466..59.442 rows=86401 loops=1)
         Recheck Cond: ((tsin >= '1974-01-01 00:00:00-06'::timestamp with time zone) AND (tsin <= '1974-01-02 00:00:00-06'::timestamp with time zone))
         Rows Removed by Index Recheck: 18047
         Heap Blocks: lossy=768
         ->  Bitmap Index Scan on electrothingy_tsin_idx  (cost=0.00..2441.43 rows=77743 width=0) (actual time=40.217..40.217 rows=7680 loops=1)
               Index Cond: ((tsin >= '1974-01-01 00:00:00-06'::timestamp with time zone) AND (tsin <= '1974-01-02 00:00:00-06'::timestamp with time zone))
 Planning time: 0.140 ms
 Execution time: 83.321 ms
(9 rows)

Result:

 count |  min  |  max  
-------+-------+-------
 86401 | 97.50 | 97.50
(1 row)

So in 83.321 ms we can aggregate 86,401 records in a table with 1.7 Billion rows. That should be reasonable.

Hour ending

Calculating the hour ending is pretty easy too, truncate the timestamps down and then simply add an hour.

SELECT date_trunc('hour', tsin) + '1 hour' AS tsin,
  count(*),
  min(temp),
  max(temp)
FROM electrothingy
WHERE tsin >= '1974-01-01'
  AND tsin < '1974-01-02'
GROUP BY date_trunc('hour', tsin)
ORDER BY 1;
          tsin          | count |  min  |  max  
------------------------+-------+-------+-------
 1974-01-01 01:00:00-06 |  3600 | 97.50 | 97.50
 1974-01-01 02:00:00-06 |  3600 | 97.50 | 97.50
 1974-01-01 03:00:00-06 |  3600 | 97.50 | 97.50
 1974-01-01 04:00:00-06 |  3600 | 97.50 | 97.50
 1974-01-01 05:00:00-06 |  3600 | 97.50 | 97.50
 1974-01-01 06:00:00-06 |  3600 | 97.50 | 97.50
 1974-01-01 07:00:00-06 |  3600 | 97.50 | 97.50
 1974-01-01 08:00:00-06 |  3600 | 97.50 | 97.50
 1974-01-01 09:00:00-06 |  3600 | 97.50 | 97.50
 1974-01-01 10:00:00-06 |  3600 | 97.50 | 97.50
 1974-01-01 11:00:00-06 |  3600 | 97.50 | 97.50
 1974-01-01 12:00:00-06 |  3600 | 97.50 | 97.50
 1974-01-01 13:00:00-06 |  3600 | 97.50 | 97.50
 1974-01-01 14:00:00-06 |  3600 | 97.50 | 97.50
 1974-01-01 15:00:00-06 |  3600 | 97.50 | 97.50
 1974-01-01 16:00:00-06 |  3600 | 97.50 | 97.50
 1974-01-01 17:00:00-06 |  3600 | 97.50 | 97.50
 1974-01-01 18:00:00-06 |  3600 | 97.50 | 97.50
 1974-01-01 19:00:00-06 |  3600 | 97.50 | 97.50
 1974-01-01 20:00:00-06 |  3600 | 97.50 | 97.50
 1974-01-01 21:00:00-06 |  3600 | 97.50 | 97.50
 1974-01-01 22:00:00-06 |  3600 | 97.50 | 97.50
 1974-01-01 23:00:00-06 |  3600 | 97.50 | 97.50
 1974-01-02 00:00:00-06 |  3600 | 97.50 | 97.50
(24 rows)

Time: 116.695 ms

It’s important to note, that it’s not using an index on the aggregation, though it could. If that’s your typical query you probably want a BRIN on date_trunc('hour', tsin) therein lies a small problem in that date_trunc is not immutable so you’d have to first wrap it to make it so.

Partitioning

Another important point of information on PostgreSQL is that PG 10 bring partitioning DDL. So you can, for instance, easily create partitions for every year. Breaking down your modest database into minor ones that are tiny. In doing so, you should be able to use and maintain btree indexes rather than BRIN which would be even faster.

CREATE TABLE electrothingy_y2016 PARTITION OF electrothingy
    FOR VALUES FROM ('2016-01-01') TO ('2017-01-01');

This is a great answer to the topic around working with analytics data on SQL databases. Finally thinking about table partitioning is always a good plan-ahead strategy for any data gets over millions and have distributed data around timestamps.

Reference: Best database and table design for billions of rows of data

Using Heroku for a quick development environment

Heroku is an industry-changing service that is established in 2007. It transformed how developers create and deploy apps today. With its add-ons marketplace, Heroku became the development hub that you can easily enable 3rd party cloud services. These services can be in many different categories that a web application may require. From database services, caching, image processing to mail delivery and so on…

Heroku supports many modern development languages that are actively used with big communities like PHP, nodejs, ruby, python, go, java… The beauty of the Heroku applications is that, managed by Heroku and very very easy to understand. They are also very easy to scale, deploy apps in Heroku infrastructure… All Heroku apps are deployed to given app name’s subdomain under herokuapp.com or can be easily set to have a custom domain for free.

Essentially, Heroku runs on a command line interface and an internal git repository to manage versions of your code. When you set up a new project folder, Heroku CLI tool registers your app and assigns a git repository. Heroku CLI doesn’t initiate git repository on your folder, so if it’s a non-git folder, you need to git init on your project folder first.

$ mkdir hello-world && cd hello-world
$ echo "{}" > composer.json
$ echo "<!--? print 'hello';" --> index.php
$ git init

$ heroku create
Creating sharp-rain-871... done, stack is heroku-18
http://sharp-rain-871.herokuapp.com/ | https://git.heroku.com/sharp-rain-871.git
Git remote heroku added

$ git add . && git commit -m "first commit"
$ git push heroku master
Counting objects: 488, done.
Delta compression using up to 8 threads.
Compressing objects: 100% (367/367), done.
Writing objects: 100% (488/488), 231.85 KiB | 115.92 MiB/s, done.
Total 488 (delta 86), reused 488 (delta 86)
remote: Compressing source files... done.
remote: Building source:
remote:
remote: -----> Node.js app detected
remote:
remote: -----> Creating runtime environment
remote:
remote: NPM_CONFIG_LOGLEVEL=error
remote: NODE_VERBOSE=false
remote: NODE_ENV=production
remote: NODE_MODULES_CACHE=true
remote:
remote: -----> Installing binaries
remote: engines.node (package.json): 10.13.0
remote: engines.npm (package.json): unspecified (use default)
remote:
remote: Resolving node version 10.13.0...
remote: Downloading and installing node 10.13.0...
remote: Using default npm version: 6.4.1
....
remote: -----> Build succeeded!
remote: -----> Discovering process types
remote: Procfile declares types → web
remote:
remote: -----> Compressing...
remote: Done: 19M
remote: -----> Launching...
remote: Released v3
remote: http://sharp-rain-871.herokuapp.com (http://sharp-rain-871.herokuapp.com/) deployed to Heroku
remote:
remote: Verifying deploy... done.
To https://git.heroku.com/nameless-savannah-4829.git
* [new branch] master → master

I highly suggest all developers adapt Heroku in their workflow, at least for the sandbox & playground purposes.

I have created some boilerplate repositories in the past:

Quick and dirty set up Graylog in 5 minutes with docker

Docker made things super easy if you are curious about a new open source tool to try and even use it with isolated installations on your machine. In this article, I’ll show quick steps to install and give graylog a try with a simple nodejs application to send logical errors to graylog instance.

1) Copy the docker-compose.yml file content below to a file then run:

docker-compose -f docker-compose.yml up

2) Login to graylog with opening http://127.0.0.1:9000/ in the browser
Username: admin
Password: admin

3) Configure inputs: Go to System > Inputs
Add new “GELF UDP” configuration as global input using port 12201

4) Run the simple nodejs application below to send logs to graylog. First init npm and install graylog2 package from npm with:

npm install -s graylog2

docker-compose.yml

version: '2'
services:
  mongodb:
    image: mongo:3
  elasticsearch:
    image: docker.elastic.co/elasticsearch/elasticsearch-oss:6.6.1
    environment:
      - http.host=0.0.0.0
      - transport.host=localhost
      - network.host=0.0.0.0
      - "ES_JAVA_OPTS=-Xms512m -Xmx512m"
    ulimits:
      memlock:
        soft: -1
        hard: -1
    mem_limit: 1g
  graylog:
    image: graylog/graylog:3.0
    environment:
      - GRAYLOG_PASSWORD_SECRET=mfyz11sanane22banane
      # Password: admin
      - GRAYLOG_ROOT_PASSWORD_SHA2=8c6976e5b5410415bde908bd4dee15dfb167a9c873fc4bb8a81f6f2ab448a918
      - GRAYLOG_HTTP_EXTERNAL_URI=http://127.0.0.1:9000/
    links:
      - mongodb:mongo
      - elasticsearch
    depends_on:
      - mongodb
      - elasticsearch
    ports:
      - 9000:9000 # Graylog web interface and REST API
      - 5555:5555 # Raw/Plaintext TCP
      - 1514:1514 # Syslog TCP
      - 1514:1514/udp # Syslog UDP
      - 12201:12201 # GELF TCP
      - 12201:12201/udp # GELF UDP

app.js

var graylog2 = require("graylog2");

var logger = new graylog2.graylog({
    servers: [
        { host: "127.0.0.1", port: 12201 },
    ],
    facility: "Test.js",
});

logger.on("error", function(error) {
    console.error("Error while trying to write to graylog2:", error);
});

setTimeout(() => {
    // logger.log("What we've got here is...failure to communicate");
    logger.log("With some data coming...", {
        cool: 'beans',
        test: { 
           yoo: 123,
        }
    });
    // logger.notice("What we've got here is...failure to communicate");

    console.log('logged?');
    // process.exit();
}, 2000);

Web, UI and browser automation with headless browsers

Wanted to give you a short information about browser automation. You visualize a desktop app when a “browser” comes to minds right? All browsers use an engine to render web pages on our screen. And these engines can actually work without rendering pages in the UI. All they need is to render the elements in memory. From there, it can allow us to interact with rendered pages programmatically without displaying the rendered page on our screens. There are browsers only works in this mode and they are called “headless” browsers. Means they have no UI. This browsers are meaningless for general consumers but it comes very handy to developer and testing community. Many companies build their testing and QA process utilizing these headless browser, do execute their UI flows with browser automation scripts. For instance, headless browser can be programmed to run and simulate the following user experience flow:

  • Load http://example.com web page,
  • Wait until page is completely rendered including javascript and css,
  • Fill “Fatih” to the field called “Name”,
  • Click to the button called “Send”,
  • Wait 5 seconds,
  • Take screenshot and save as JPEG

This can be very useful when doing regression tests.

Event utilizing screenshots with headless browsers will be very useful. There are many companies doing screenshot comparison for high level understanding changes done visually based on any given iteration on the code. This process simply takes and keeps versions of each page and in every release, it takes a new one with latest version and compares the pixels (and colors) to the previous version to determine a percentage for the change it detects. Then you can set some report and process to make sure you track of big changes to detect if a tiny css change blew a page you usually don’t test manually. It becomes very meaningful when you think about a web page with 100 different pages.

Are there any headless browsers I can use?

The well known headless browsers; the one named “Phantom” (and phantomjs) that is big on nodejs community. There is also headless chrome which is based on chromium.

There is an extensive list of all headless browsers out there here: https://github.com/dhamaniasad/HeadlessBrowsers

Happy browser automations 🙂

Bitbucket static website hosting

This is a short explanation of a feature I really like about github and now it’s imitated in bitbucket. Essentially allows you to host a static site under your account.

It doesn’t support anything back-end but you can use grunt, gulp like automators to create a content management system that compiles whole site to static files then serve it up with this trick.

Very simple steps to do this. My username is “mfyz” in bitbucket and bitbucket allows 1 static website hosting per account. If you create a new repository called: “mfyz.bitbucket.io” and throw an index.html file, you can access the static website from “http://mfyz.bitbucket.io” address. Bitbucket will serve anything static including css, javascript files as well as binaries like images.

Great resource to learn programming Swift

If you are interested in getting started with mobile development and if you like to start with iOS, I bumped into a great resource to learn Swift. There are tons of sample projects and great video walkthroughs as well as source codes of the projects you can download from GitHub.

Lessons Page:
https://swifteducation.github.io/teaching_app_development_with_swift/

Available on iTunesU to follow lessons on mobile devices:
https://itunes.apple.com/us/course/app-development-teaching-swift/id1003406963

Sample projects’ source codes:
https://github.com/swifteducation

A Beginner’s Guide to HTML & CSS

 @shayhowe sum up HTML & CSS for beginners: “A Beginner’s Guide to HTML & CSS” http://learn.shayhowe.com/html-css/

A nice presentation in 10 topics showing techniques that’s not outdated. Most of the resources you search on web about html and css, are from 90s showing very old outdated methods.

Shay Howe also started to work on “Advanced Guide to HTML & CSS”. It’s still in progress but it’s accessible as it’s available http://learn.shayhowe.com/advanced-html-css/

Integration and verification of iOS In-App Purchases

 Economy models in iOS apps use In-App purchases become very popular. Lots of developers pick iOS environment because of the flawless payments through iTunes.

If you’re planning to have a monetization model in your app, it has to go through Apple system and you have to use in-app purchases. There is no other way to accept payments from your iOS apps. There are pros and cons of using Apple in-app purchases. I’ll try to explain some of them.

The biggest con is Apple takes 30% of your sale. And another con is, there are difficulties and grayed areas in the integration of in-app purchases to your app and back-end. But the pros make all even. Because delegating whole payments to Apple is gonna affect your sales because Apple makes it so seamless that it reduces all money related steps to only one confirmation box. So it changes the purchase experience and makes it what it supposed to be. Most of the checkout or payment experiences on web, faces lots of drops because of unnecessary and boring steps like putting your credit card info, trying to give the trust to user that you’re a legitimate company and have legitimate payment system that you will not sell their info out or you won’t let hackers to pick your customer info up. All those buying experience changed in iTunes payments. So this is why you should want to integrate in-app purchases. Continue reading “Integration and verification of iOS In-App Purchases”

Profiling and optimization on Facebook PHP SDK

If you’re developing PHP based Facebook application, you might want to use (or already using) Facebook integration little more than just authentication and identification of your user. Even if you have the simplest Facebook app and using PHP SDK, you probably have regularly done API calls.

You write your app and you start to see performance issues. You start to optimize your database interactions, PHP code optimization, after you done with your application optimization if you still have performance problems it’s possibly from Facebook calls. Since you use SDK, you might not know what’s happening with Facebook communication. So you want to do profiling between your app and Facebook API servers.

You can add a basic timing profiling to your API calls to see how many calls you do, what kind of calls they are and how long they take to run.

Let’s dive in SDK, modify it a bit and start getting profiling information. Here is the actual method you need to modify in base_facebook.php file:

public function api(/* polymorphic */) {
	$args = func_get_args();
	if (is_array($args[0])) {
		return $this->_restserver($args[0]);
	} else {
		return call_user_func_array(array($this, '_graph'), $args);
	}
}

and we’re modifying it like this:

$facebookApiCalls = array();
public function api( /* polymorphic */)
{
	$args = func_get_args();

	$time_start = microtime(true);

	if (is_array($args[0])) {
		$result = $this->_restserver($args[0]);
	} else {
		$result = call_user_func_array(array($this, '_graph'), $args);
	}

	$time_end = microtime(true);
	$time_elapsed = $time_end - $time_start;
	$time_elapsed *= 1000; //convert to millisecs

	if (isset($GLOBALS['facebookApiCalls'])) $GLOBALS['facebookApiCalls'][] = array(
		'duration' => $time_elapsed,
		'args' => $args,
	);
	return $result;
}

It simply appends a global array named “facebookApiCalls” and adds the API call details as “args” and timing as “duration”. So at the end of your page logic code, you can print this information after sorting it by duration and you can also filter to show only slow ones (for instance, the ones took over 200 milliseconds).

After this profiling you can start to identify the slow calls, also if you do same calls multiple times because of recursing, recalls etc…, you can see and optimize, combine them.

This optimization is not only a performance tweak for the user, also it will decrease the number of calls made between your server and Facebook servers.

Database Integration in PHPStorm, PyCharm or RubyMine

JetNrains released better database integration to their IDEs which applies to PhpStorm, PyCharm and RubyMine. They had database integration with some level of functionality but recently they released a video with their latest updates which is included in this post. I didn’t use database integration before in PHPStorm but i tried after seeing this video and i found it very productive and helpful.

After installing Java connectors (which you can do it with no extra effort) you’ll be good to go for connecting your database with many different database engines in your project. With database integration, you can review the structure of your database, access and manage your data and develop your SQLs with lots of cool features. These stuff are pretty standard so far, almost like a replacement of PHPMyAdmin. Nothing very new.

I found a particular connection between my code and my database very helpful, and that is, you can develop your SQL while you write your code, or you can test and run your SQL from your code without touching, copy/pasting. Also it does code IntelliSense while you write yourSQL which saves some time from mistypes and makes sql development more fun.

Check this video out for feature tour:

Source: http://blog.jetbrains.com/webide/2012/11/sql-support-and-database-tools/

PHPStorm: Most advanced PHP IDE so far

I’ve been using PHPStorm from day one of their beta release, and very happy with it.
They enhanced Java based NetBeans in the beginning, but it’s completely boosted with a lot of features.

Biggest problem developing web projects using PHP is the lack of tools and big effort requirements for creating a stable integrated development environment. There are very good simple and clean editors but none of them is not farther than a code intellisense enabled editors. What I mean is there are debuggers, advanced editors, database management tools, but all of them has their own ways, not communicating and not integrated. And it varies on different operating systems.

When I first tested phpstorm in the beta times, they had this minimal advanced editor with some half working hard to configure add-ons like svn support, debugger integration etc but wasn’t easy to get it up running. But they improved the initial configuration steps much easier, they touched lots of add-ons to get them more integrated with less configuration and they started to support modern languages for different web technologies (html5, less, sass, haml). Here is a couple of features that I like and probably you’ll find them very usefull as well.

Code Intellisense is not just for PHP, also most of the languages that you use for general PHP based web project (HTML, Javascript, CSS, XML). Also, code intelligence supports most of the PHP, Javascript frameworks and helps you to get faster coding.

Debugging PHP runtime with xdebug, you can catch, stop and debug your PHP app while it’s running. Also, makes the error handling way easier.

Version control system integration allows you to integrate your svn, git projects, access versions and manage working copy.

Database connectors support all SQL engines that Java not just allows to browse, alter your database structure also there is a database console that you can use code IntelliSense when you develop your SQL. This is a common feature for most IDEs so far but PHPStorm also uses database connections for every project when you write/browse or debug your PHP code if it’s running a SQL. You can run or use code IntelliSense when you’re writing your SQL in your code.

Also, PHPStorm has other ton of features like automatic deployment, automatic upload over FTP/SFTP protocols, zen coding, code snippets etc…

They released 6 major versions in 3 years that was basically touched version of NetBeans in the beginning but now it gives totally enhanced and different coding experience. Unfortunately, you need to pay $100, the first time and it gives free updates in minor releases. But if you want to update in major releases you need to upgrade your license in 1 year periods for $50. But it’s nothing compared to what you get.

JetBrains also develops most of the features in PHPStorm for their common product base which you can have similar or same features in their other IDEs for Ruby and Python developers. If you develop Python or Ruby, you should check PyCharm and RubyMine out.

PHPStorm’s homepage: http://www.jetbrains.com/phpstorm/

How to display AppStore banner in your web page

If you have an app and you might want to show an app banner when you user visit your page from their mobile safari. For iOS devices, displaying appstore banner is as easy as adding a meta tag to your html page.

How To Implement To Your Website

Add this meta tag to your web page: <meta name="apple-itunes-app" content="app-id=your_app_id" />

You need your app’s id (a numeric identifier) which you can get it from iTunesConnect interface.

When you add this meta tag to you page, safari handles the rest and shows the banner. In iPad, it also shows some of the screenshots of your app.