WordPress Headless + CPT + ACF: Building a Flexible Content Platform

This article will guide you through creating a flexible and dynamic content platform using WordPress as a headless CMS, Custom Post Types (CPTs), and Advanced Custom Fields (ACF). Whether you’re a seasoned developer or just starting out, this combination offers a powerful foundation for your projects.

Why Go Headless with WordPress?

Think of WordPress as the brains behind your content, and a headless setup as giving it the freedom to power any front-end you want. This means you can use your favorite framework (React, Vue.js, etc.) to create a beautiful and performant user interface.

One of the big benefits of using wordpress headless is to remove concerns of any front-end from the actual WordPress. This is one of the things I struggled a lot in the past working with wordpress that there is a plugin for everything. And you can easily end up in a place with 20+ plugins bloating your wordpress installation. Most of them are about front-end website experience. This way, you can also separate your editorial needs from your developer teams’ needs, making your developer team more independently optimize and deploy your website, without worrying about risking editorial mishaps.

Setting Up Your Local Test Environment

Before we dive into the fun stuff, let’s set up a playground. Here’s what you’ll need:

  • WordPress Installation / Local Server: Use Docker for a streamlined setup. Check out this docker compose I wrote a few years back, it should still be a good place to start: https://github.com/mfyz/wordpress-docker-compose or I’m sure you can find a valid/recent example quickly.
  • Headless Framework: Consider Next.js for a React-based frontend. You can find a sample project I played with it here: https://github.com/mfyz/next-wp

Unleashing the Power of WP-JSON

WordPress’s REST API, accessible through wp-json, is your gateway to interacting with your content programmatically. Let’s explore it using Postman.

Exploring the WP-JSON Endpoint with Postman

Postman is a fantastic tool for testing APIs. Here’s how to utilize it for exploring the WordPress REST API:

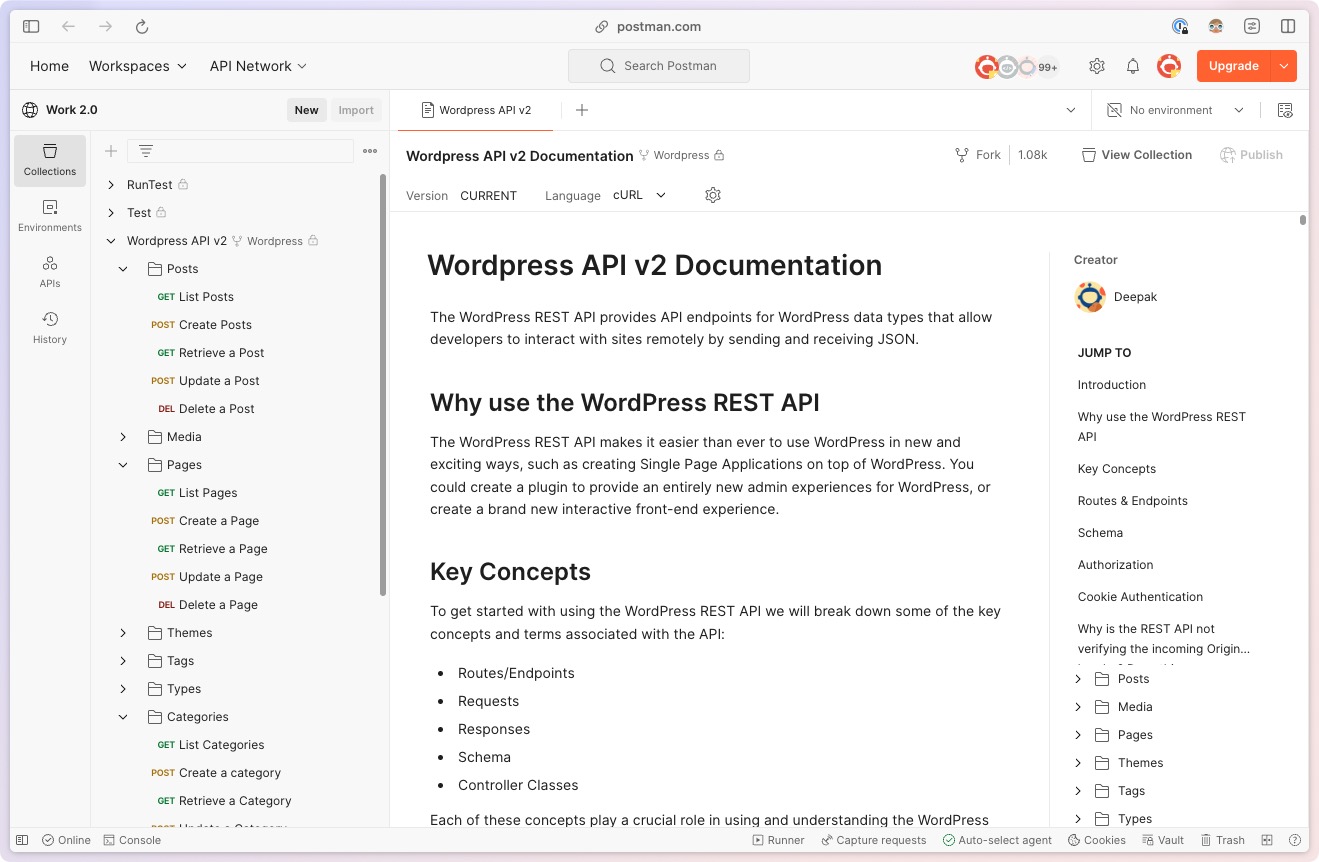
  • Import a Postman Collection: Import the pre-built WordPress Postman Collection to get started quickly. This collection provides pre-configured requests for interacting with various WordPress resources.
  • Test Requests: Send GET requests to retrieve various post types, pages, and custom fields. Explore the available endpoints and data structures.

Customizing Your Content types with Custom Post Types (CPT)

WordPress offers you the flexibility to create custom post types beyond the standard posts and pages. Think of these as building blocks for your unique content structure (Imagine unique content types, like: recipes, books, hardware, people, places…).

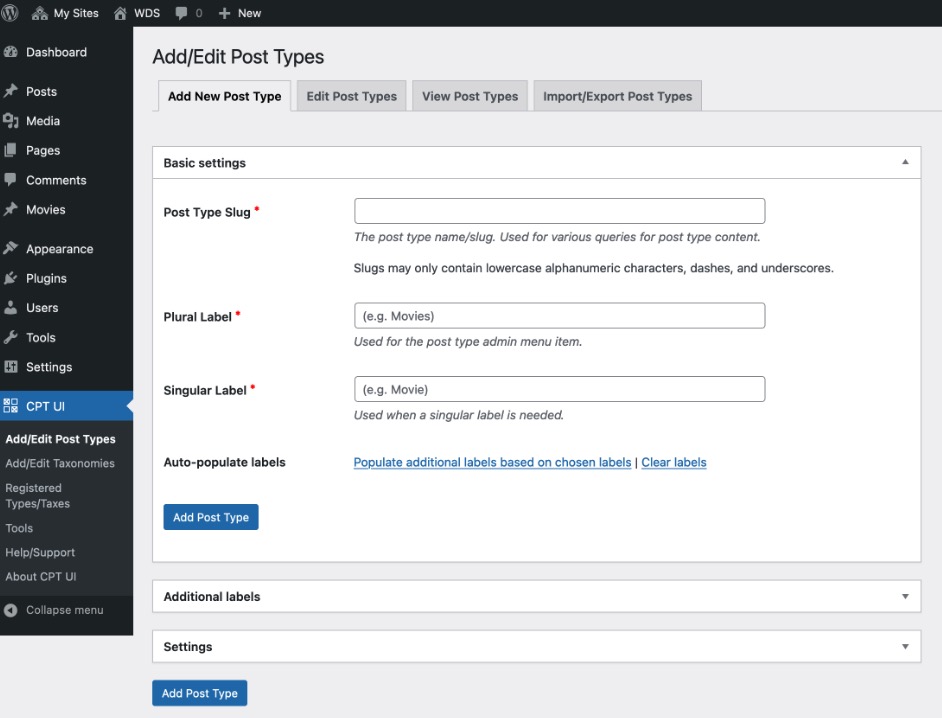
Custom Post Type UI is a user-friendly plugin allows you to easily create, manage, and customize custom post types directly within your WordPress admin panel. It eliminates the need for manual coding, making CPT creation accessible to users of all skill levels.

Advanced Custom Fields with ACF

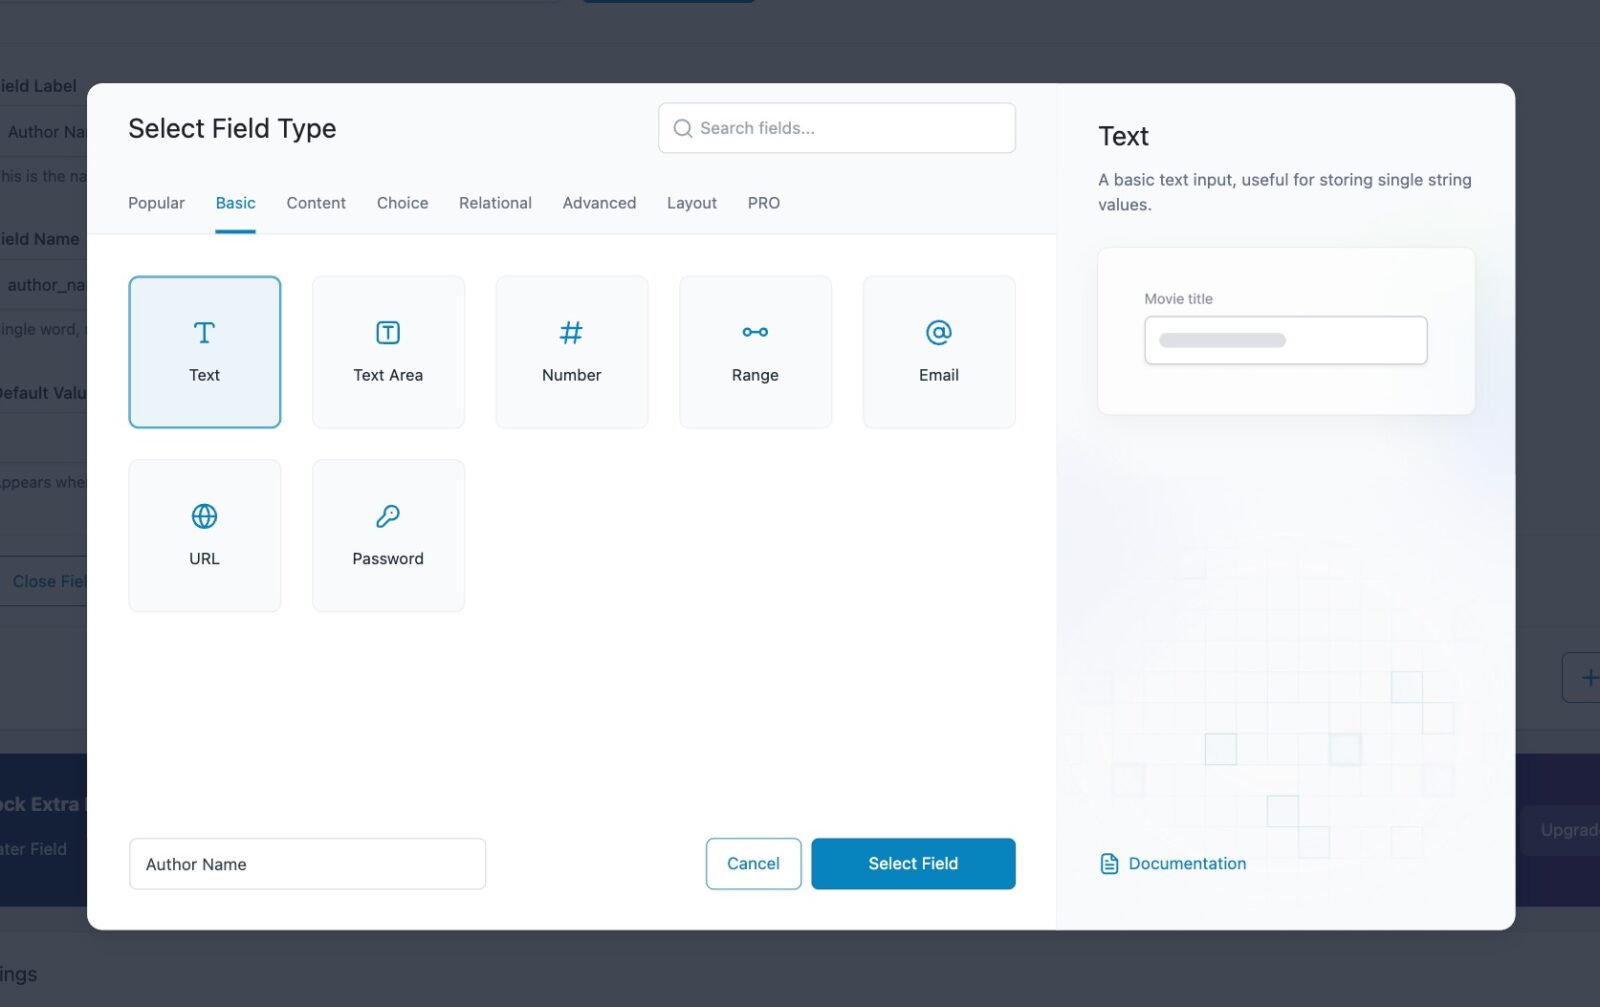
Advanced Custom Fields (ACF) is a game-changer for content management. It lets you create custom fields for your custom post types, making them more flexible and dynamic. Think of it like building blocks for your content.

Here’s what you can achieve with ACF:

  • Create Flexible Layouts: Design complex page layouts with varied content formats using ACF fields.
  • Simplify Content Creation: Provide editors with user-friendly interfaces for adding and managing content, even for complex data structures.
  • Enhanced Data Management: Store complex data structures efficiently with custom field groups.

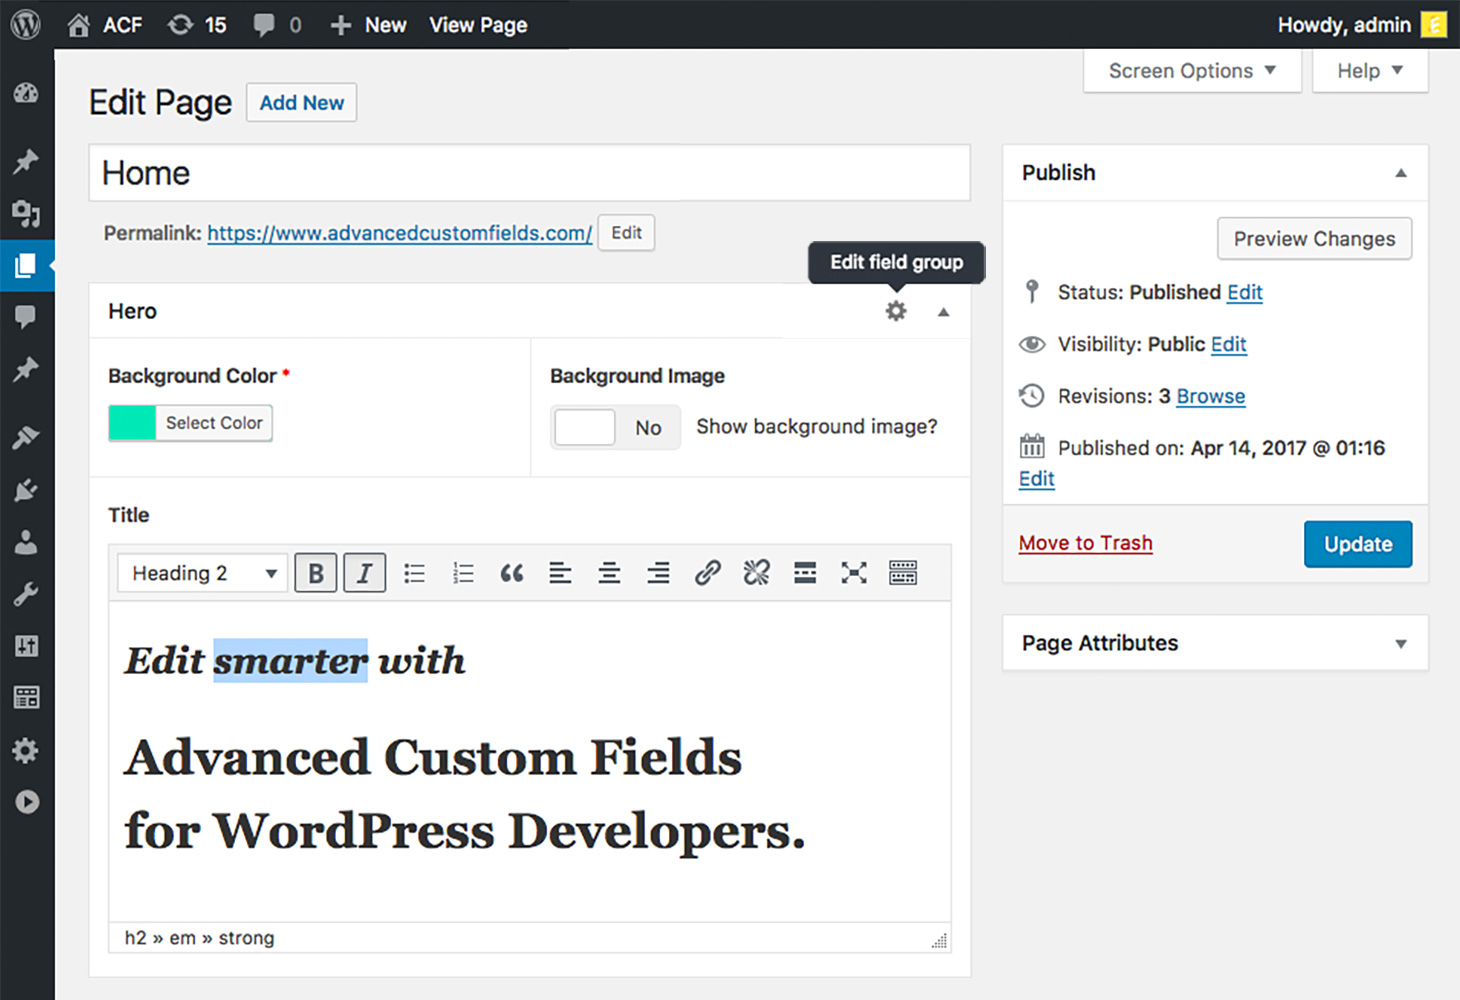
Here is how your custom fields will look like in your pages, or posts:

I find this very intuitive.

When combining it with the CPT UI plugin, it becomes really customization. CPT UI has additional controls to make the “editing” experience simpler for custom types (like disable Guttenberg, disable the body of the post altogether, and other customizations).

ACF will promote its PRO plan a lot, but you don’t need its pro version in most cases.

Front-end freedom

Using WordPress empowers your front-end team to choose their favorite front-end framework, push the boundaries of customization and performance for your front-end of your experiences.

It can also centralize your content platform for multi-channel digital experiences like website, mobile apps, OTT apps (TV apps).

In the summary at the top, I mentioned the next.js sample I played with a few years back to use simple wordpress + CPT UI + ACF combination. You can browse the source code here: https://github.com/mfyz/next-wp

I hope this article provides a solid foundation for your headless WordPress journey.

Now go ahead and build something amazing!

Using Airtable through its API programmatically, as (almost) remote database

I recently talked a lot about the importance of collaborative and smarter documentation that will improve your personal and professional workflow. Certainly, it will be different than other competitors in an interesting use case I found myself in one of the hobby projects that I used Airtable as a remote database tool all of the sudden.

Airtable is a very nice mobile-friendly document management in a “spreadsheet” style base. You can create your data structure in any data table model. You can create different views for your data (in calendar view, or filtered table view, or kanban view…).

img_0201.jpg

What makes Airtable special for me is its API. Their API is so easy to get started and access, because you get your data-specific API documentation after you login. It shows your data in API example right and there in the dynamic documentation.

img_0200.png

Airtable API essentially makes Airtable that can be used as a remote database for small or personal projects. Managing your data belongs to Airtable’s clean and nice web or mobile interface, and you implement your data in any format you like on any platform.

If you are needing read-only access, implementing Airtable API can be a matter of minutes since the documentation gives access to your data very quickly. You only need to convert the curl request to your favorite platform’s HTTP request. If you are needing a javascript version, it also produces NodeJS example code that you can drop in and start using your data.

img_0199.png

Write access is also not very different than read-only. Your data model will be well be documented in the dynamic API documentation for your table. You only need to start constructing your API requests and make the call…

If you haven’t created an Airtable account and played with it, definitely do so: https://airtable.com/ and check out their auto-generated documentation here: https://airtable.com/api (after you login to your account).

Profiling and optimization on Facebook PHP SDK

If you’re developing PHP based Facebook application, you might want to use (or already using) Facebook integration little more than just authentication and identification of your user. Even if you have the simplest Facebook app and using PHP SDK, you probably have regularly done API calls.

You write your app and you start to see performance issues. You start to optimize your database interactions, PHP code optimization, after you done with your application optimization if you still have performance problems it’s possibly from Facebook calls. Since you use SDK, you might not know what’s happening with Facebook communication. So you want to do profiling between your app and Facebook API servers.

You can add a basic timing profiling to your API calls to see how many calls you do, what kind of calls they are and how long they take to run.

Let’s dive in SDK, modify it a bit and start getting profiling information. Here is the actual method you need to modify in base_facebook.php file:

public function api(/* polymorphic */) {
	$args = func_get_args();
	if (is_array($args[0])) {
		return $this->_restserver($args[0]);
	} else {
		return call_user_func_array(array($this, '_graph'), $args);
	}
}

and we’re modifying it like this:

$facebookApiCalls = array();
public function api( /* polymorphic */)
{
	$args = func_get_args();

	$time_start = microtime(true);

	if (is_array($args[0])) {
		$result = $this->_restserver($args[0]);
	} else {
		$result = call_user_func_array(array($this, '_graph'), $args);
	}

	$time_end = microtime(true);
	$time_elapsed = $time_end - $time_start;
	$time_elapsed *= 1000; //convert to millisecs

	if (isset($GLOBALS['facebookApiCalls'])) $GLOBALS['facebookApiCalls'][] = array(
		'duration' => $time_elapsed,
		'args' => $args,
	);
	return $result;
}

It simply appends a global array named “facebookApiCalls” and adds the API call details as “args” and timing as “duration”. So at the end of your page logic code, you can print this information after sorting it by duration and you can also filter to show only slow ones (for instance, the ones took over 200 milliseconds).

After this profiling you can start to identify the slow calls, also if you do same calls multiple times because of recursing, recalls etc…, you can see and optimize, combine them.

This optimization is not only a performance tweak for the user, also it will decrease the number of calls made between your server and Facebook servers.