Hosting my hobby projects from cheap HP mini desktop from my closet (Verizon Fios)

Why?

For me, self-hosting is like having my own personal playground where I can experiment, tinker, and learn. It’s a great way to explore new technologies, try out different setups, and have fun with my projects.

As part of my job, I need to have a deep understanding of developer experience. The best way to build this understanding is to be the developer, both initial experience with any development tool, as well as day-to-day work with these systems. Self-hosting is in a way, building empathy with the developer community. Understanding differences, and good/bad versions. My main reason is “learning”.

There are a bunch of other reasons one may choose to do this:

  • Privacy: your data
  • Full control: You own it (well, both good and bad)
  • Cost-effective: (may not be always true, but mostly true)

You shouldn’t do this… But if you really want to…

I don’t suggest this route for the majority of the people. It’s hard, you’ll hit walls way more frequently than you want. You have to be a warrior. If your reason is similar to mine, go for it. There is a strong determining factor though, your connectivity.

Let’s get started. I’ll start the connectivity, then the hardware and software.

Sounds common but not so common: It’s a privilege to be on Fios

While high-speed internet has become more commonplace, it’s still a privilege, especially in the United States. We’re (I’m) definitely taking it for granted. I use Verizon Fios is a fiber internet service. If it wasn’t for this, I wouldn’t self-host my stuff.

The big practical separation for Fios is how stable it is, regardless of the “mpbs/gbps” package you have. I used Fios in residential and office setups in New York City for years. I got off as I moved to different neighborhoods and I really really missed it when I didn’t have it, even though I got 1gbps service packages from other providers.

Back in the day when we used dial-ups and tried to play Half-Life (or Counter-Strike) online, your connection speed mattered but “lag” mattered even more. I lived in Turkey back then and we had a cable internet provider vs ADSL services the difference was, that you were getting super low lag/ping in cable network even though you were 1/4, 1/3th of the connection speed you had compared to other services that bragged how fast they were. Didn’t matter when playing online.

I have 300/300mbps, what’s called a “symmetrical” connection. 300mbps is already way higher than average internet connectivity worldwide (although certain countries/cities regions have way faster networks, overall world citizen gets access to the internet at lower speeds). But it would be ok even if it was slower because it’s a Fiber network and it’s symmetrical which means download and upload speeds are the same. Often you see traditional ISPs advertise something ridiculous with high speeds like 500mbps, but it’s often only referred to as download speeds. And in the majority of consumer scenarios, this is fine. But you need the upload speed to be high and consistent/stable when you want to serve upstream.

Hardware

Since it’s hobby purposes, I initially searched some “old” servers (like servers sitting on racks) on eBay. Then I realized it had a million combinations of hardware components, like CPU architectures, and network interfaces. I quickly went down the rabbit hole of Reddit threads both fun and scary stories. These “serious” server hardware were electric eating, heating sources that are also giant, require space kinda machines turned me off and I backed out quickly.

Then I explored mini PCs, which are more common computers that could handle my applications really easily. Think like you’re looking for a computer that you could use, but instead, you just host stuff and it sits somewhere in your home in a closet, without being a fire risk or a thing that you need to worry about how to keep it cool.

I bought an “HP Elite Desk Mini” which is a decent computer if I were to use it as my desktop. It has 16GB memory, an i7 quad-core CPU, and 510 GB SSD. I think I bought it under $150 on Amazon. You can go fancier with a much beefier machine with a few hundred dollars if you’re being much more serious about this. I’m thinking of buying another (same machine) and stacking them.

The footprint of this machine is super small. It snuck under my Verizon router in a closet, has almost zero noise, and barely heats. I’m sure if I find an ARM version of this thing (or a Raspberry Pi) I can go smaller and have almost no heat but I’ve never seen overheating on these.

Whether this machine is a good or bad hardware decision, it’s debatable, but I’m really happy a few years in.

Software: Ubuntu & Docker

The first thing I did was to clean it up and install Ubuntu (LTS). Almost bare bones Ubuntu then right away docker installed.

I have Nginx and PHP on it for some early play of a WordPress blog (not this one) but then abandoned it.

I run almost everything exclusively in Docker (more on this below).

I try to update & upgrade Ubuntu once a year. Nothing else.

Access: Cloudflare Zero Trust

The machine itself is completely closed to direct internet access. Its IP Tables don’t allow connections even from the local network (except SSH port accepts local network IP range).

Traditionally, the machine needs to open ports outside, then have a router port forwarding and set up all public IP sort things. More than 2 decades ago I did that with static IP from my ISP. Man, all the hustle…

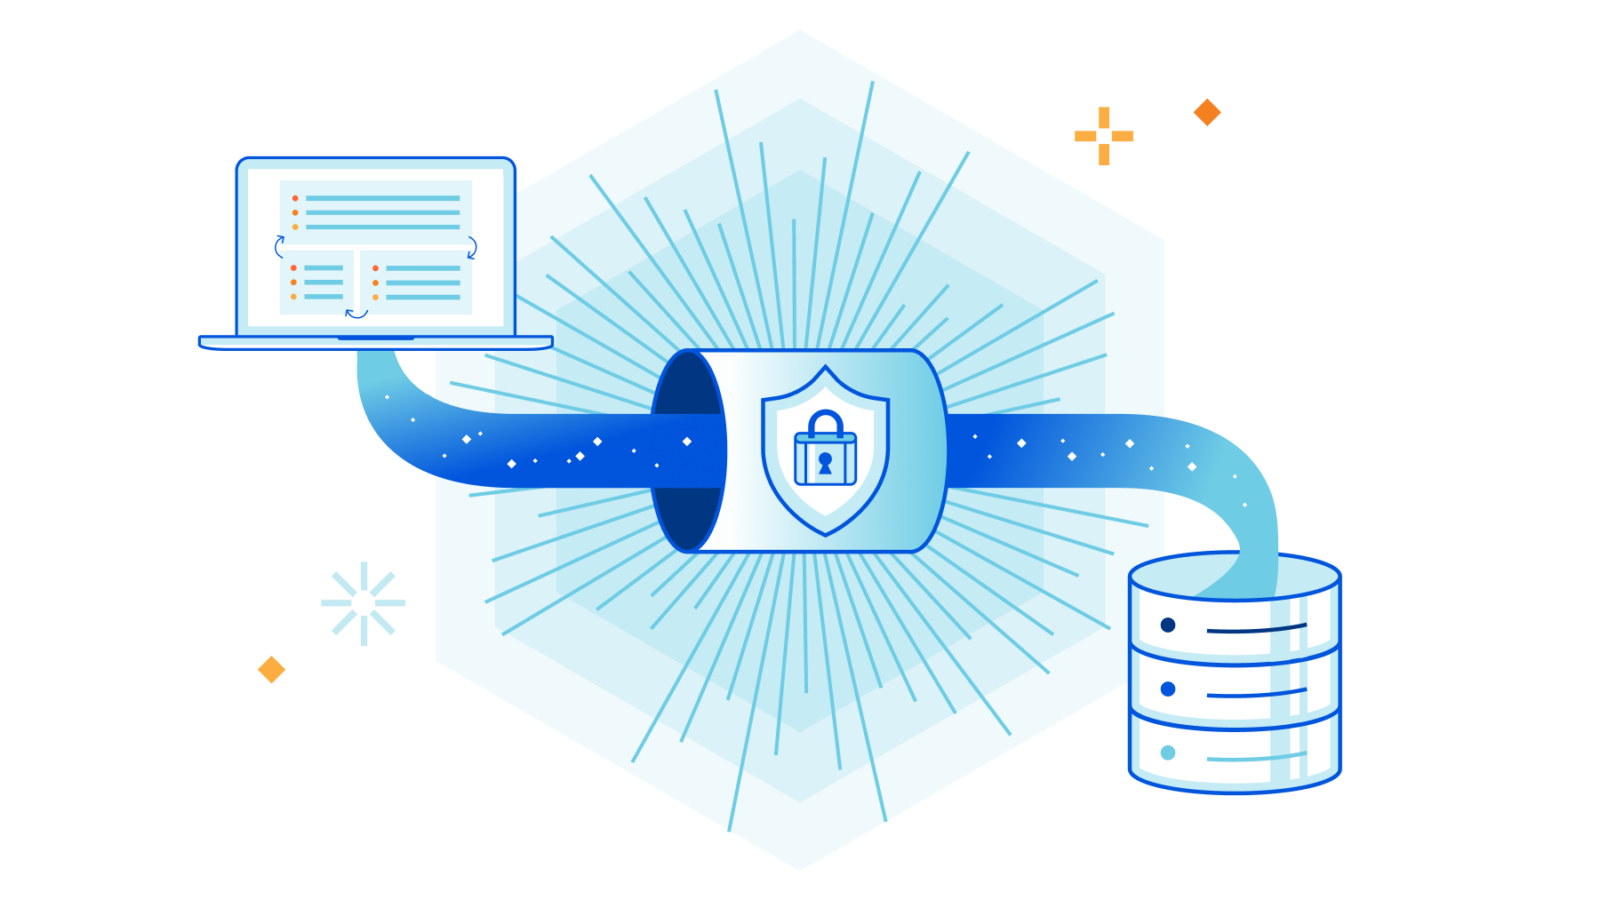
None of that is necessary anymore. I use Cloudflare Access, Tunnels which has an agent always running in the server, and from remote configuration, I can listen to any internal port (without opening it up) and forward the port directly to a subdomain of my domains. This shortcut the DNS works for me too. On top of that, most of my private apps run on subdomains that are protected by Cloudflare Zero Trust access (only me). I love Cloudflare’s feature that solves 2 to 3 problems at once.

One might wonder, what happens if Cloudflare has an outage, and their Zero Trust tools stop working, does it open my apps to the public all of a sudden? No, because my apps are not open to the public in the first place. Zero Trust tunnel has to work in order to open it up to the public, and if Zero Trust authentication is down, the subdomain will also not be accessible (because it’s proxied through Zero Trust “application” record.

Worst case scenario, I lose access to my private apps from outside. Even with that, I can SSH to my server and create a tunnel, port forwarding to the specific port the app is running.

On a normal day, I simply join to Zero Trust network using Cloudflare’s desktop app WARP, which replaces VPN for me.

All things considered, I’m sure there are still holes and paranoia in this plan. You can go through a more traditional route that is not any different than hosting this instance in Digital Ocean or AWS and replicate what you think is “more secure”, but I’m pretty happy with the baseline Cloudflare brings, and solves a few unnecessary things I have to take care (like no need to do reverse proxy for all apps I’m running).

Deploy apps: Portainer + Gitops

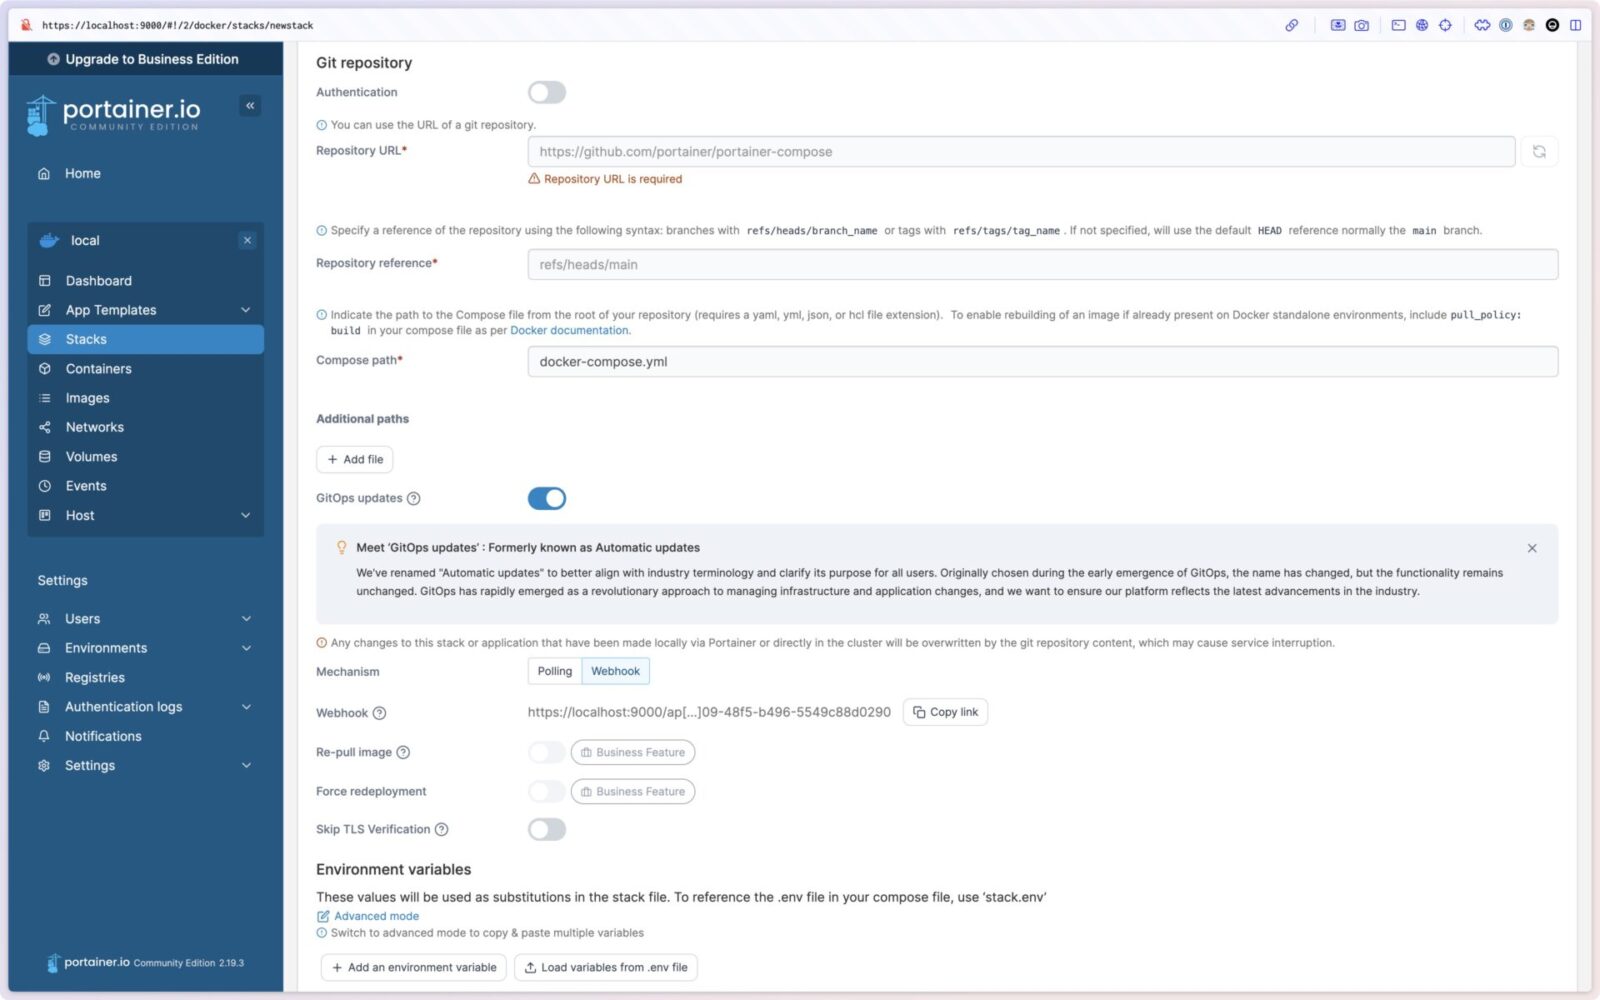
I use Portainer to both setup deployments and manage my containers. Portainer is essentially a nice UI version of your docker command line tools. But where it shines is the gitops integration that integrates with github via webhooks, so when I push any change to any of my app repos (which all have docker-compose.yml that includes their infra and application configurations), my apps get re-deployed by portainer. This makes spinning up a new app, or an open-source tool in my server, a breeze.

I covered portainer and its gitops integration in this article: Portainer + gitops ❤️: A simple way to deploy and manage your self-hosted applications
Monitor everything with Healthchecks.io

Why monitor?

Monitoring is essential for ensuring the reliability and performance of your applications. It’s like having a watchful eye on your systems, allowing you to proactively identify and address issues before they impact your users. Imagine you’re the pilot of a plane in the air, and monitoring means having a set of tools tell you things are not going right instantly. Not having the right signals could mean death.

There are various ways you can externally monitor services, at least half of the stuff I manage are private, non-public apps, services, and scripts. The best way to monitor them is using Dead man’s switch approach. It means, detecting a failure when a process gets non-operational (for whatever reason). Each service is expected to “report” that they are still functioning in an expected timeframe (you can determine what that means in your business logic).

Healthchecks.io

I use healthchecks.io, an open-source monitoring tool for this.

I monitor my servers, containers, APIs, backups, scripts, you name it. Although I use other monitoring tools for service availability; I find healthchecks.io the main and my go-to when I consider keeping an eye on a service’s operational availability.

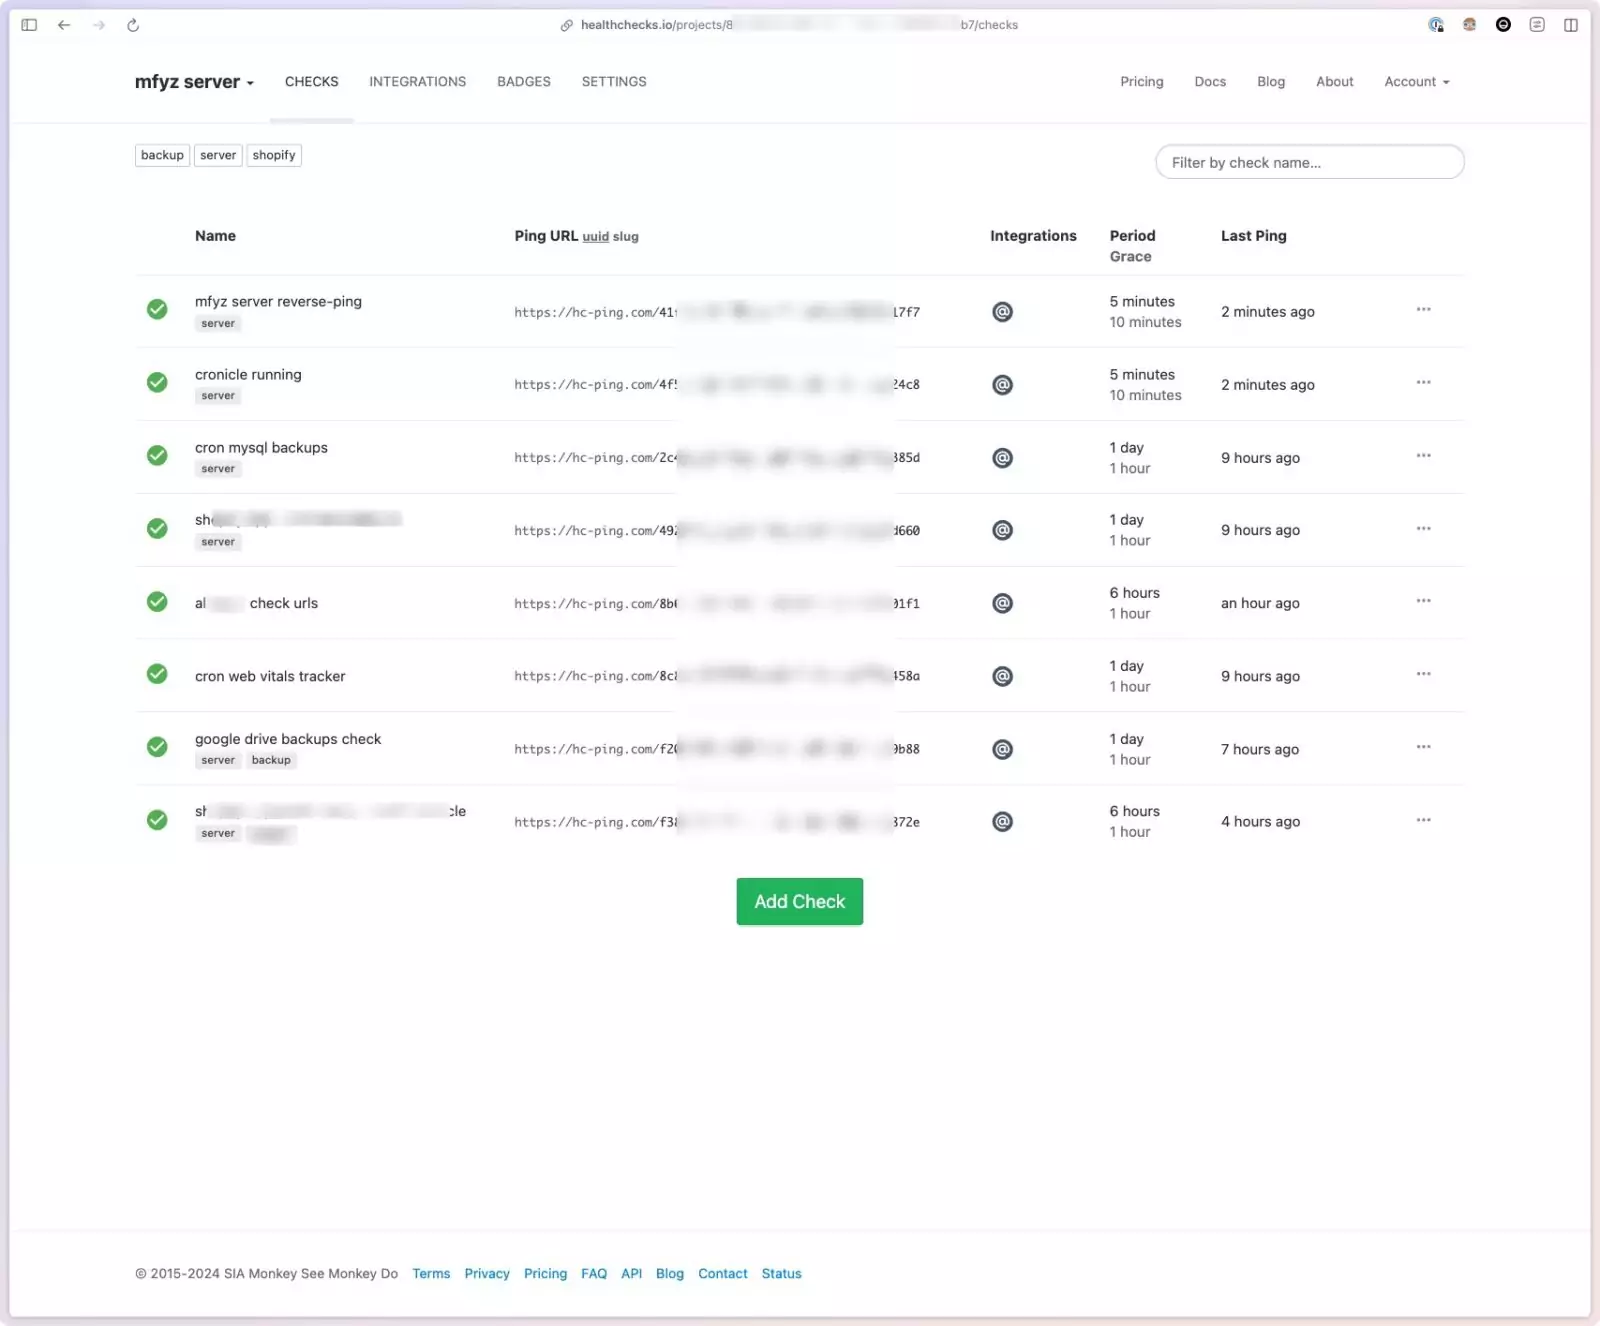
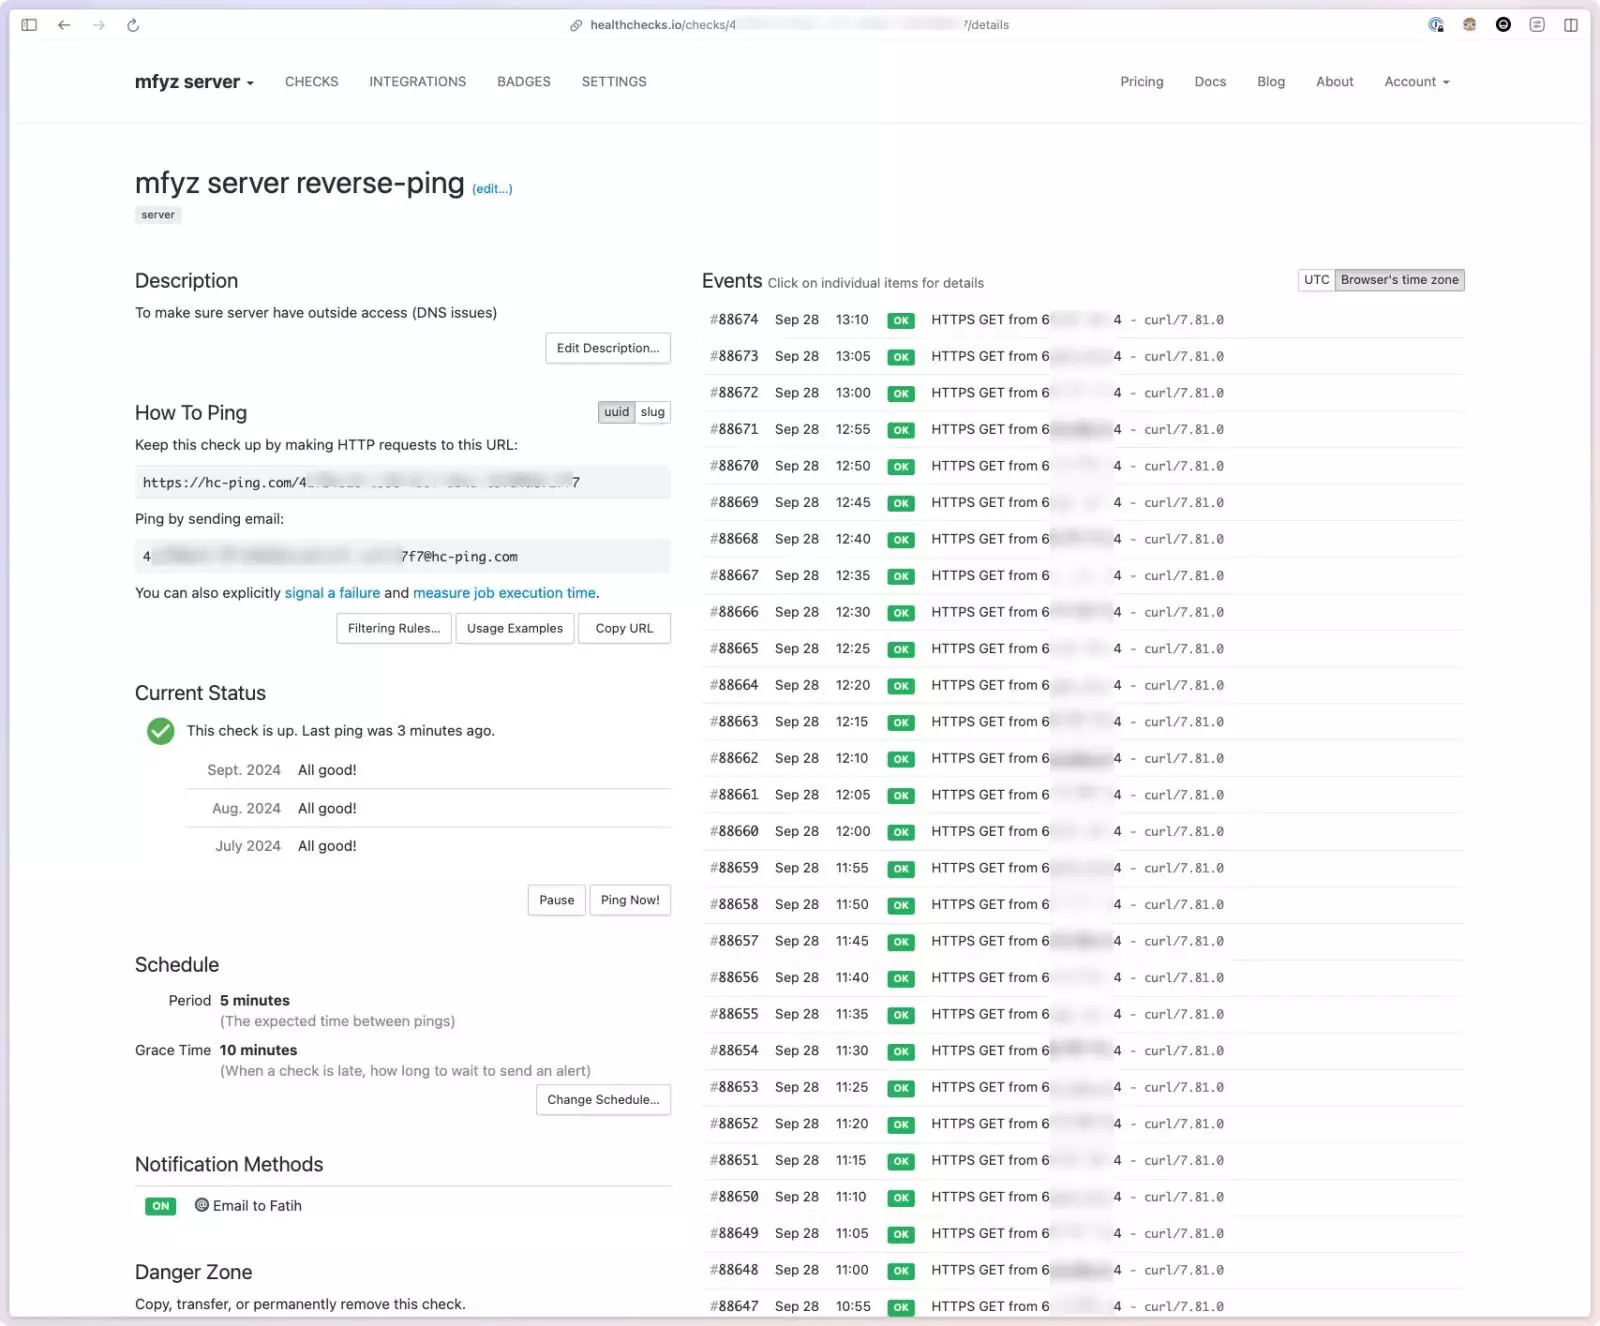
Here is the screenshot of my checks for random things that I need to keep an eye on:

For each check, you can see the recent history of the pings, and you can see the settings.

Setting up a check

You create a new “check” by pretty much only giving it a name and picking what’s the timeframe that ping is expected (from the source). You can give checks, and descriptions (I often write up where the ping is located, like, mfyz server → crontab → check-daily-backups.sh), and you can give tags, that help organize checks.

Scheduling

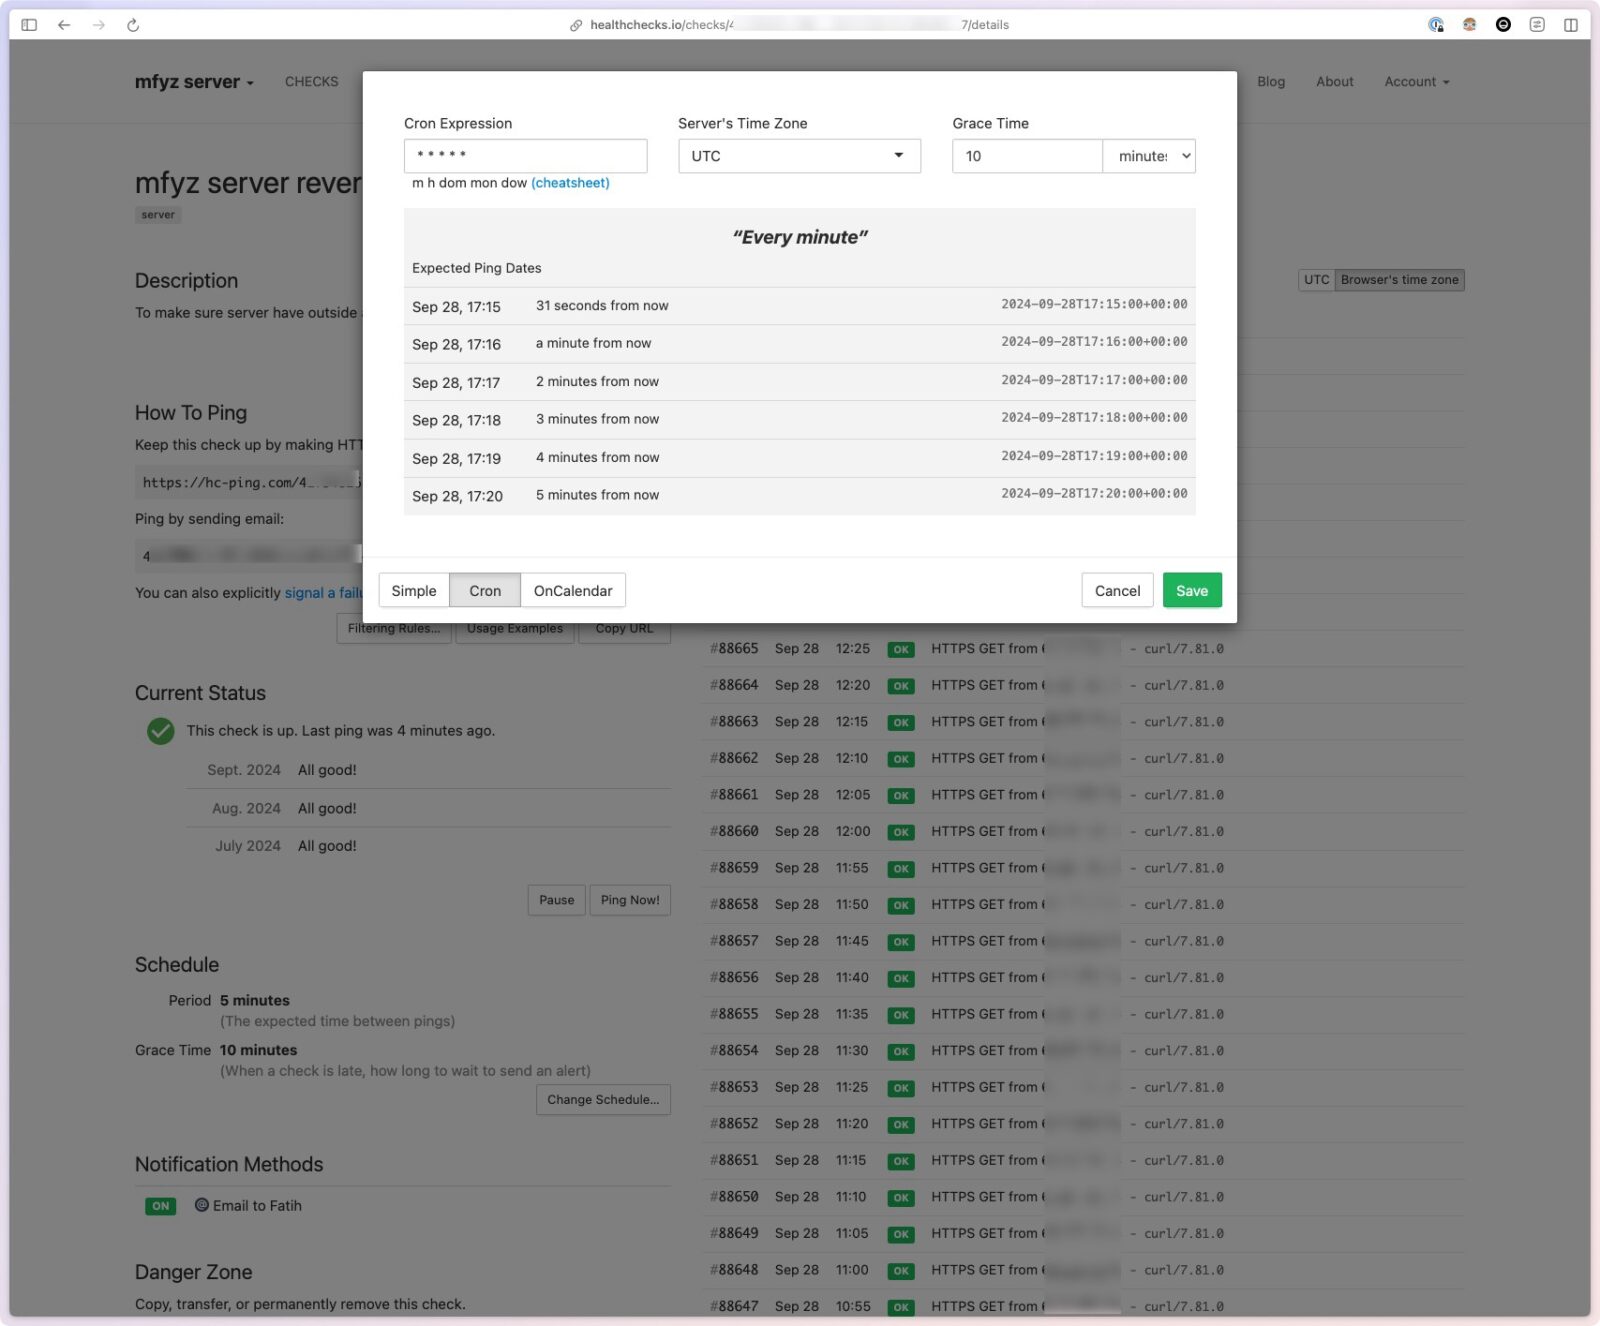
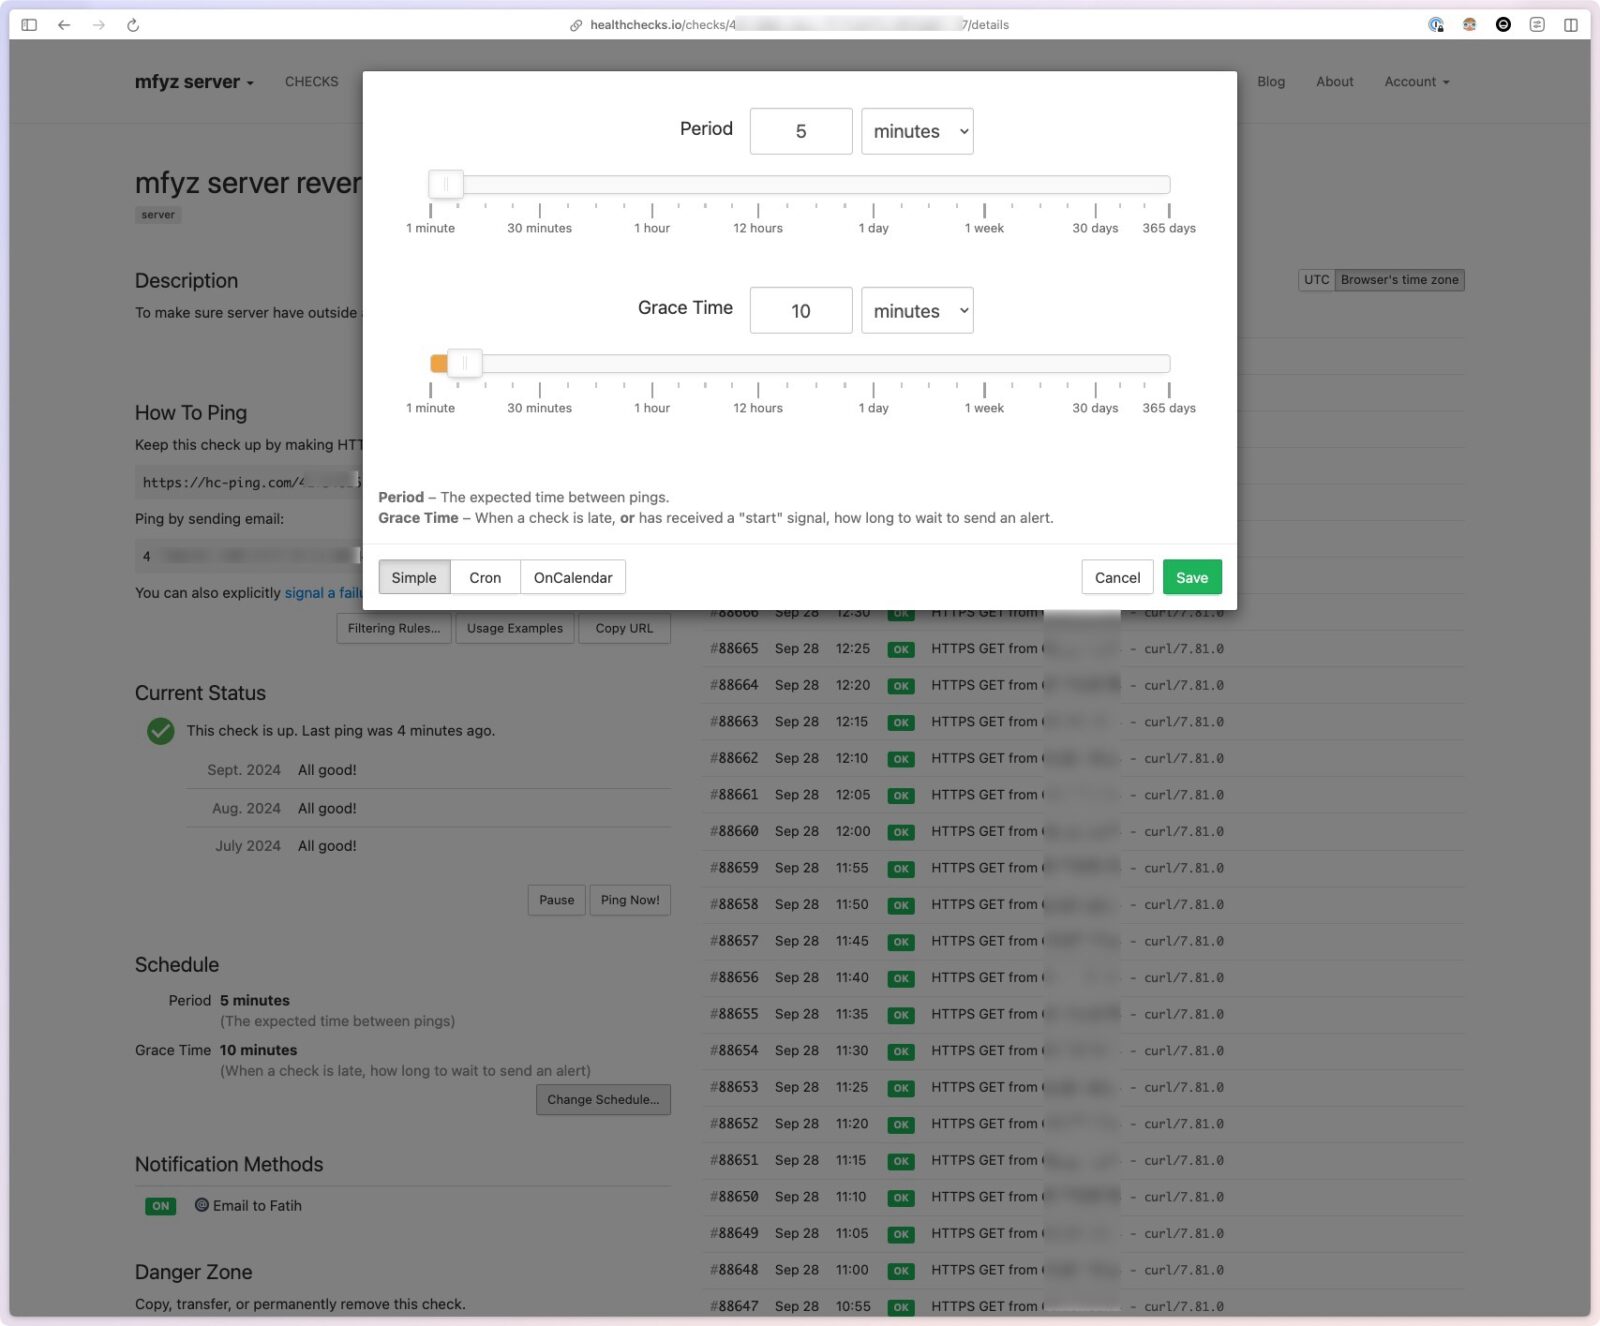
Use simple visual scheduling and grace period configuration, or enter crontab expression (which you can also generate with many online tools easily, with verbal expressions like every “Monday, 1 am”)

Preview the schedule:

Each check essentially gets a unique long-id and you get a ping URL. It’s a simple curl/HTTP GET request to that URL that you can make in any method you want. Each ping marks the check “healthy” until healthchecks.io does NOT receive a ping within the timeframe it’s configured.

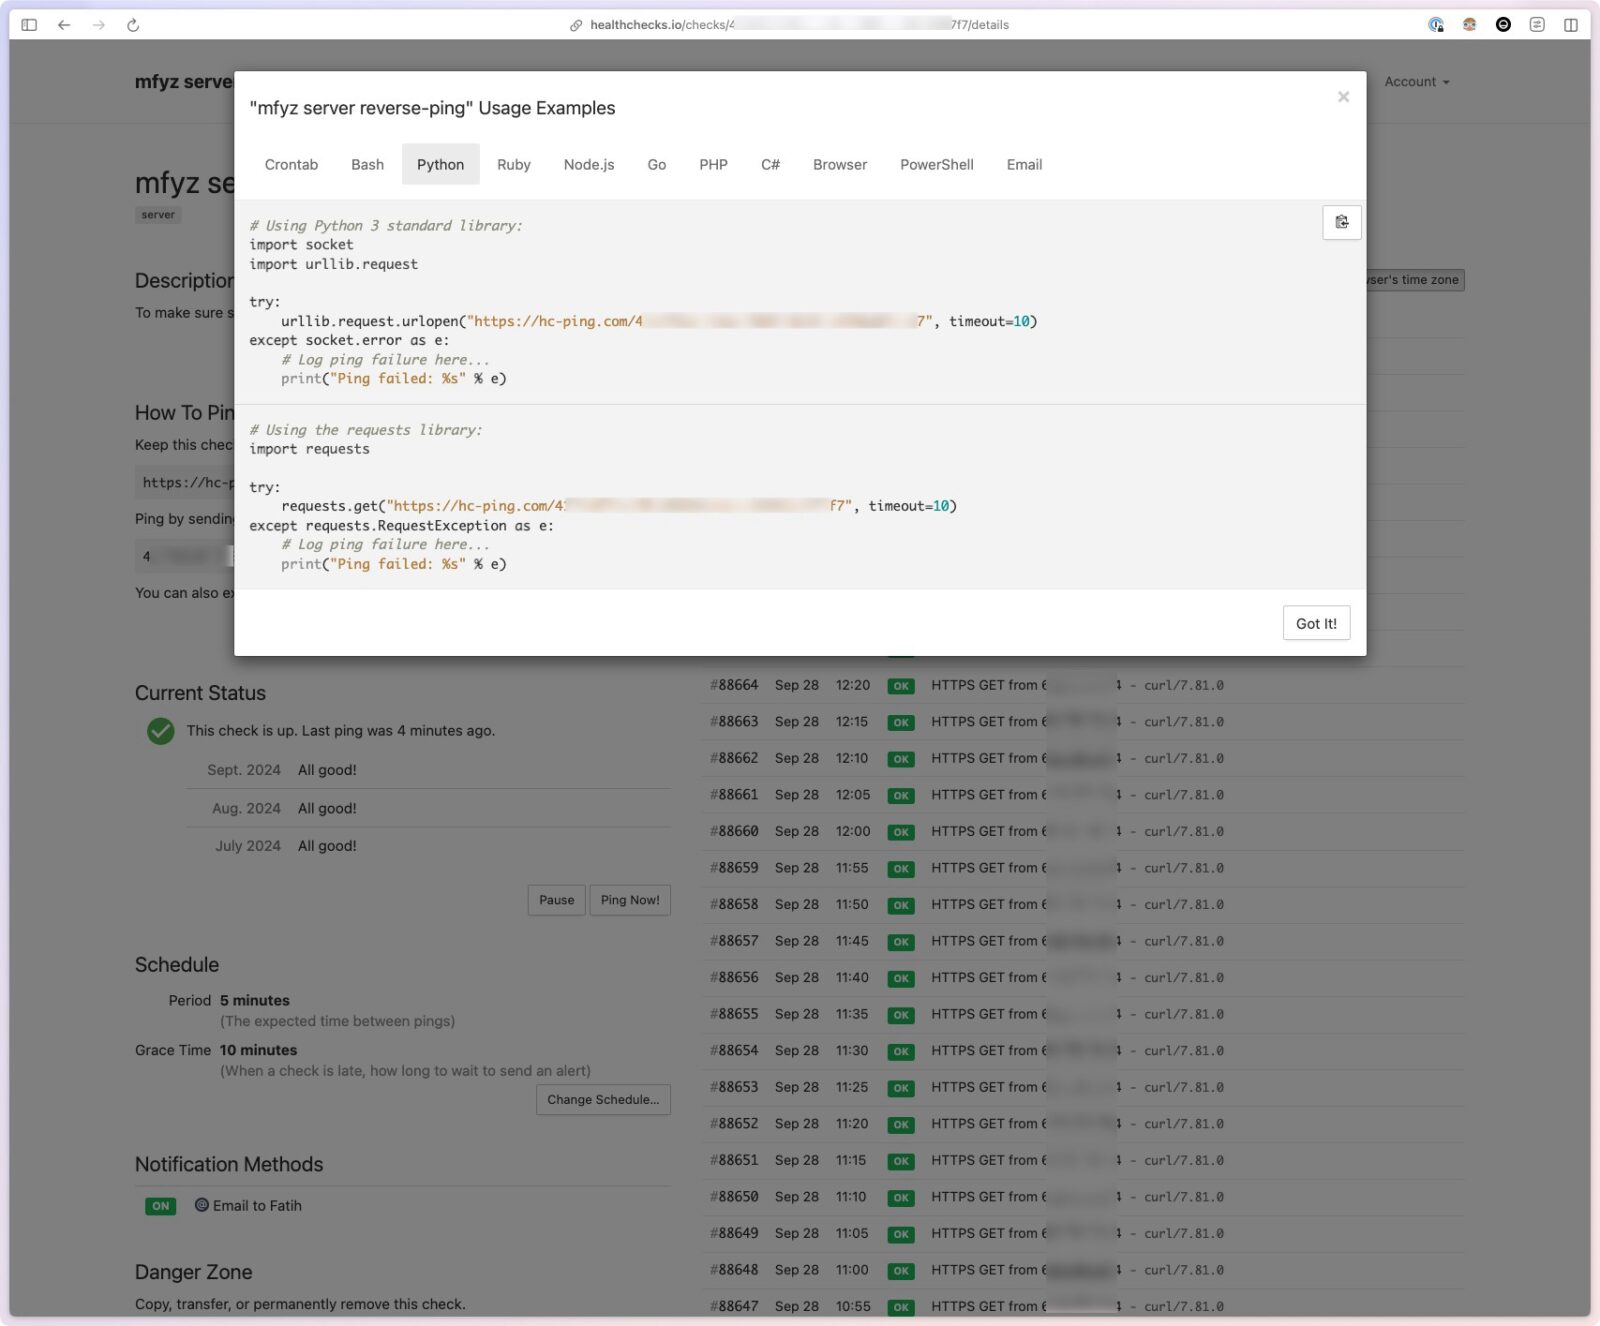
Healthcheck.io also gives copy/paste snippets for various languages on the check detail page:

Integrations and Extensibility

I love healthchecks.io because it’s a very simple tool, that does not have 50 screens or settings, but well designed/thought service that provides rich ways to configure, and interact with it. A few points I find it really useful:

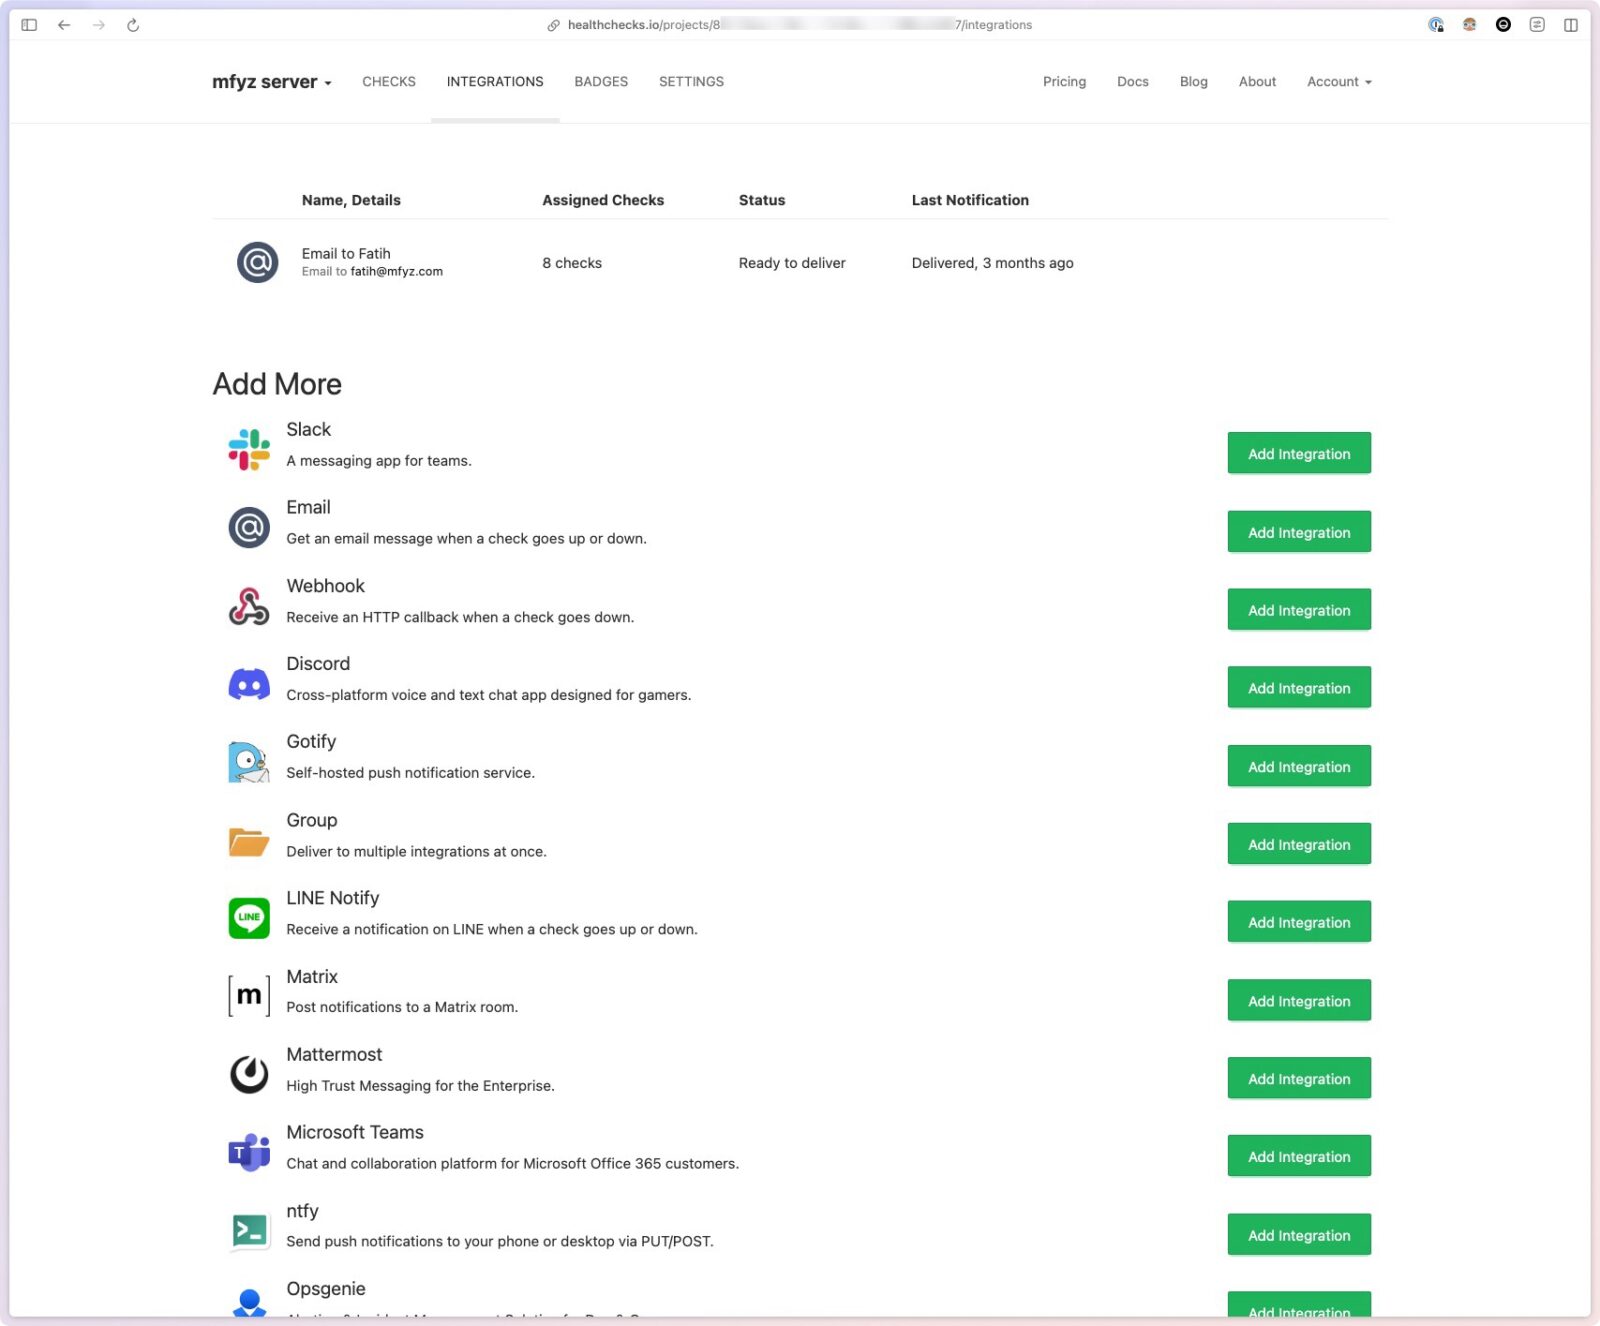
Integrations with almost anything I need

Integrations are mostly notification channels, but most are just a few clicks configuration.

REST Management API

Pretty much any object and any action you do in the UI can be done via their rest API.

https://healthchecks.io/docs/api

Badges

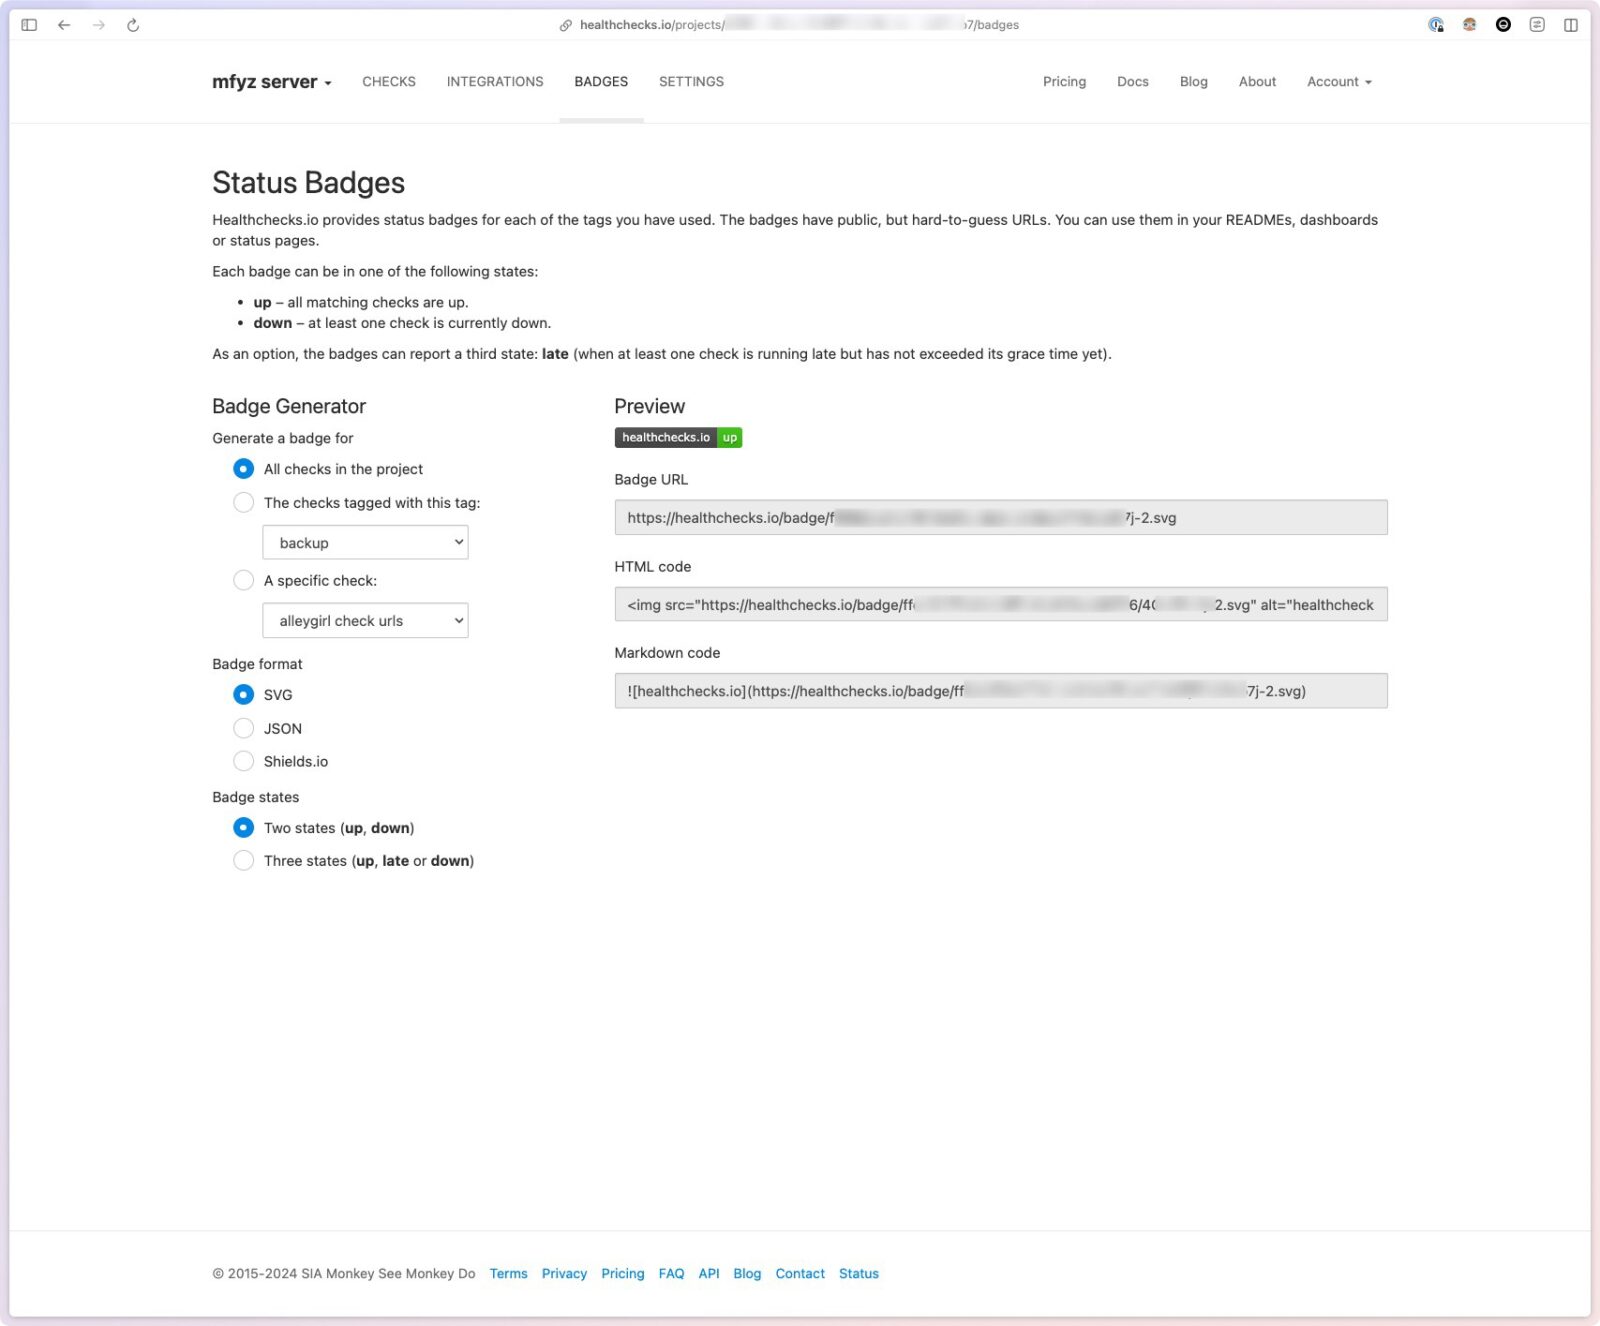
To slap status badges easily in random places (dashboards and such):

Self-hosted vs Cloud/SaaS Healthchecks.io

Healthchecks.io is an open-source tool. You can host your own instance easily using its docker-compose.yml file. They also have a cloud/SaaS version with a fair free/hobby plan that should be more than enough to track your microservices, servers, cron jobs, etc for your small/side projects. I use their cloud version but I can move to my own self-hosted version any time I want.

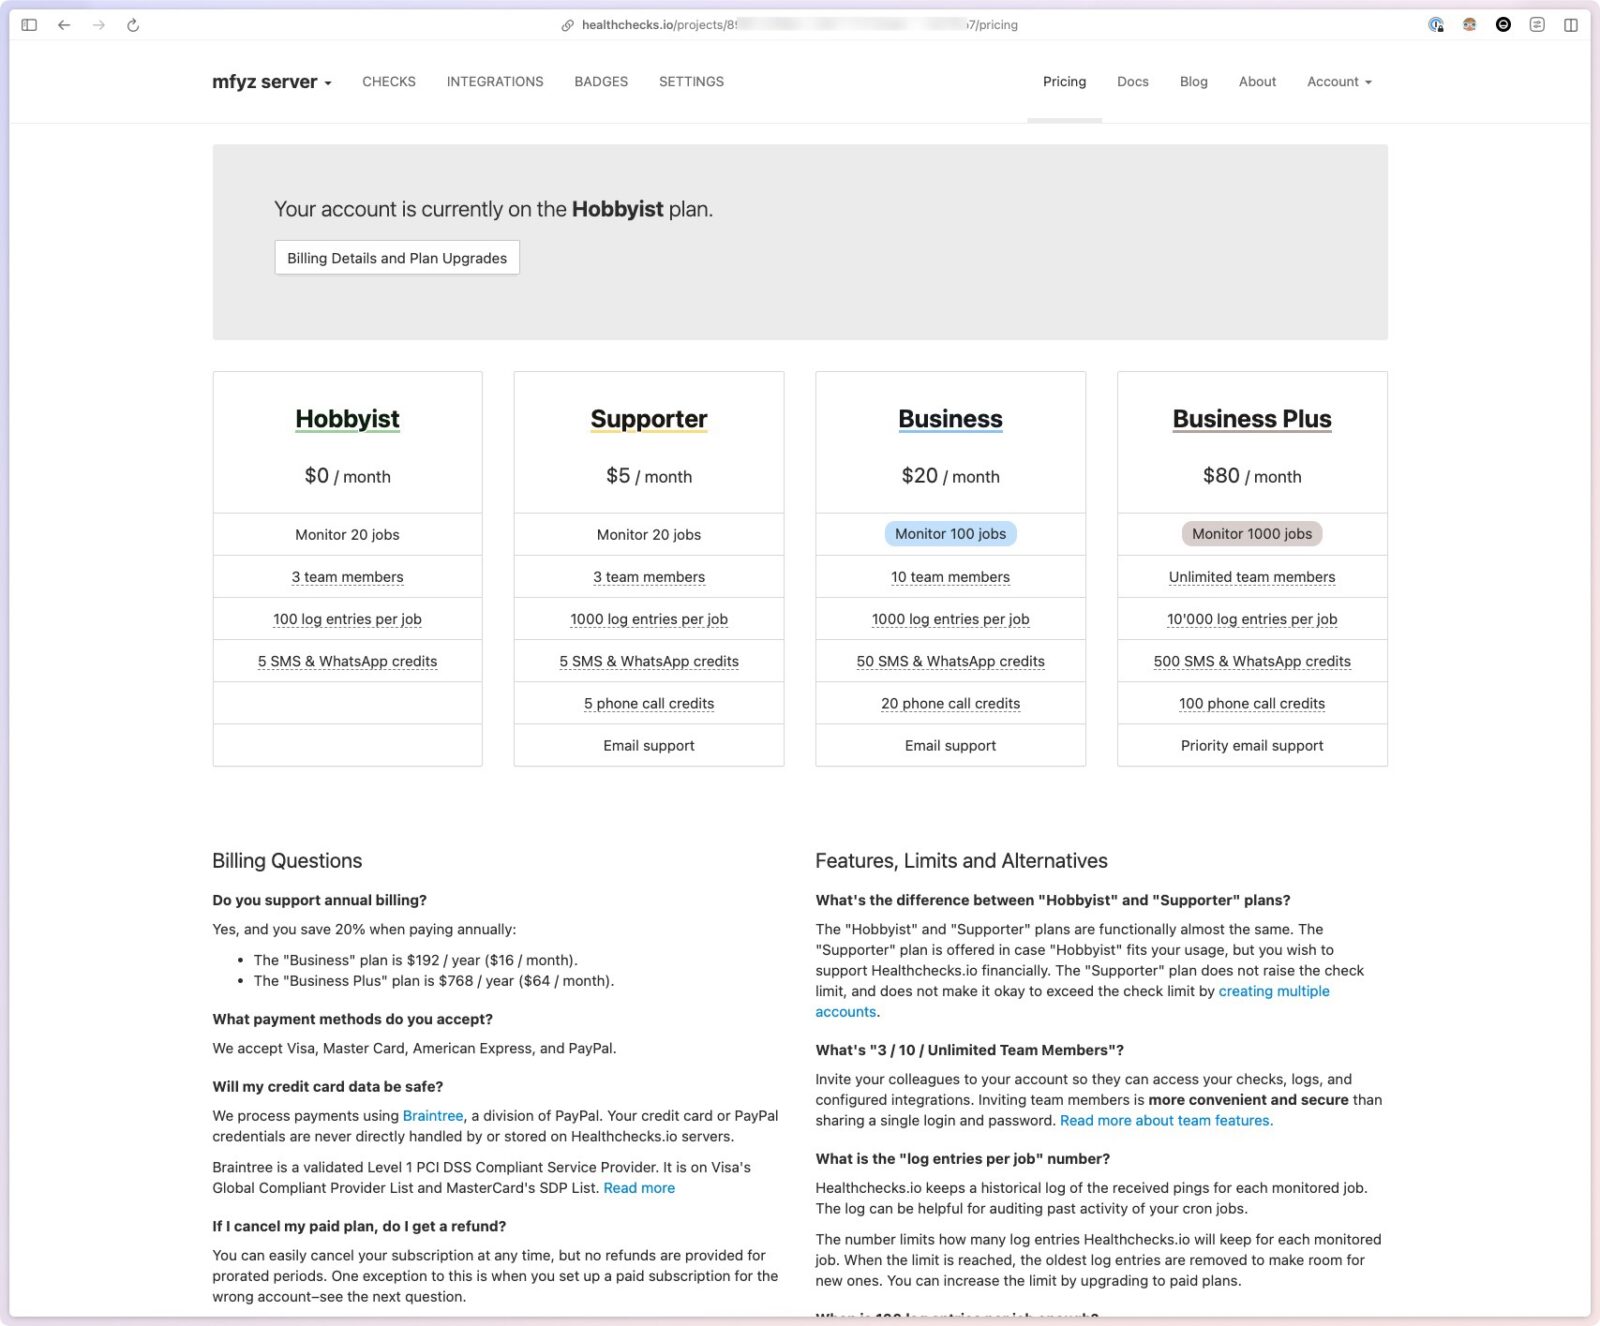
In the case I grow my use of healthchecks, I find their pricing plans really reasonable and I’d most likely stick with their cloud version and would be happy to pay:

I’ll suggest an alternative below, but before that, I want to say, that even though there are richer and more powerful services, I prefer to keep my monitoring separated and have more control over them. Example: I do have an end-to-end script that browses a few pages and checks stuff using playwright, and I try to keep it experiment plain/simple on purpose. And simply have a bash script that runs the playwright test and pings a check in healthchecks.io when it passes. That monitor is simple enough that I can move to any other service, or move the test from where it runs to another place without worrying about any vendor lock. Instead, I would have used a service like Checkly but it would lock me in right away. In short, I like how healthchecks.io contributes to this decoupled model and plays a central reporting engine for my monitors.

Best next alternative: Uptime Kuma

If you want a more robust monitoring tool that has more ways to monitor your services, and websites, beyond the dead man’s switch method, check out uptime kuma.

It has almost all the features healthchecks.io has, plus a few more:

  • Status pages
  • More check methods like DNS record, ping, docker container, SSL cert
  • Its Web UI looks more traditional monitoring tools like uptime history, response time, etc

Run via Docker:

docker run -d --restart=always -p 3001:3001 -v uptime-kuma:/app/data --name uptime-kuma louislam/uptime-kuma:1

Check out the project page: https://github.com/louislam/uptime-kuma

Portainer + gitops ❤️: A simple way to deploy and manage your self-hosted applications
Self-hosting became a much easier and more viable option using docker. You don’t need to understand the source code or have no intent to customize stuff. Setting things that you are not familiar with made open source applications require their own experts.

Docker made all of this almost like installing an app on your computer from a binary. In fact, I never installed Redis directly on my computer before, yet, I have half a dozen apps that have their own Redis instances humming happily on my server and I have zero concerns about how to set it up in case I need it directly on my projects.

I’m going to give you my personal go-to way of how I host my applications like simple nodejs, php applications, WordPress sites, and many open source tools (that are also saas, but I choose to host my own instance).

Portainer: My Container Management Maestro

Portainer acts as my central command center for all things containerized. This handy tool lets me build, deploy, and manage both individual containers and entire stacks. Did I mention it runs as a lightweight container itself? Here’s a peek at my streamlined docker-compose.yml for Portainer:

version: "3"
services:
  portainer:
    image: portainer/portainer-ce:latest
    restart: unless-stopped
    ports:
      - 9000:9443
    volumes:
      - data:/data
      - /var/run/docker.sock:/var/run/docker.sock
volumes:
  data:

Web UI

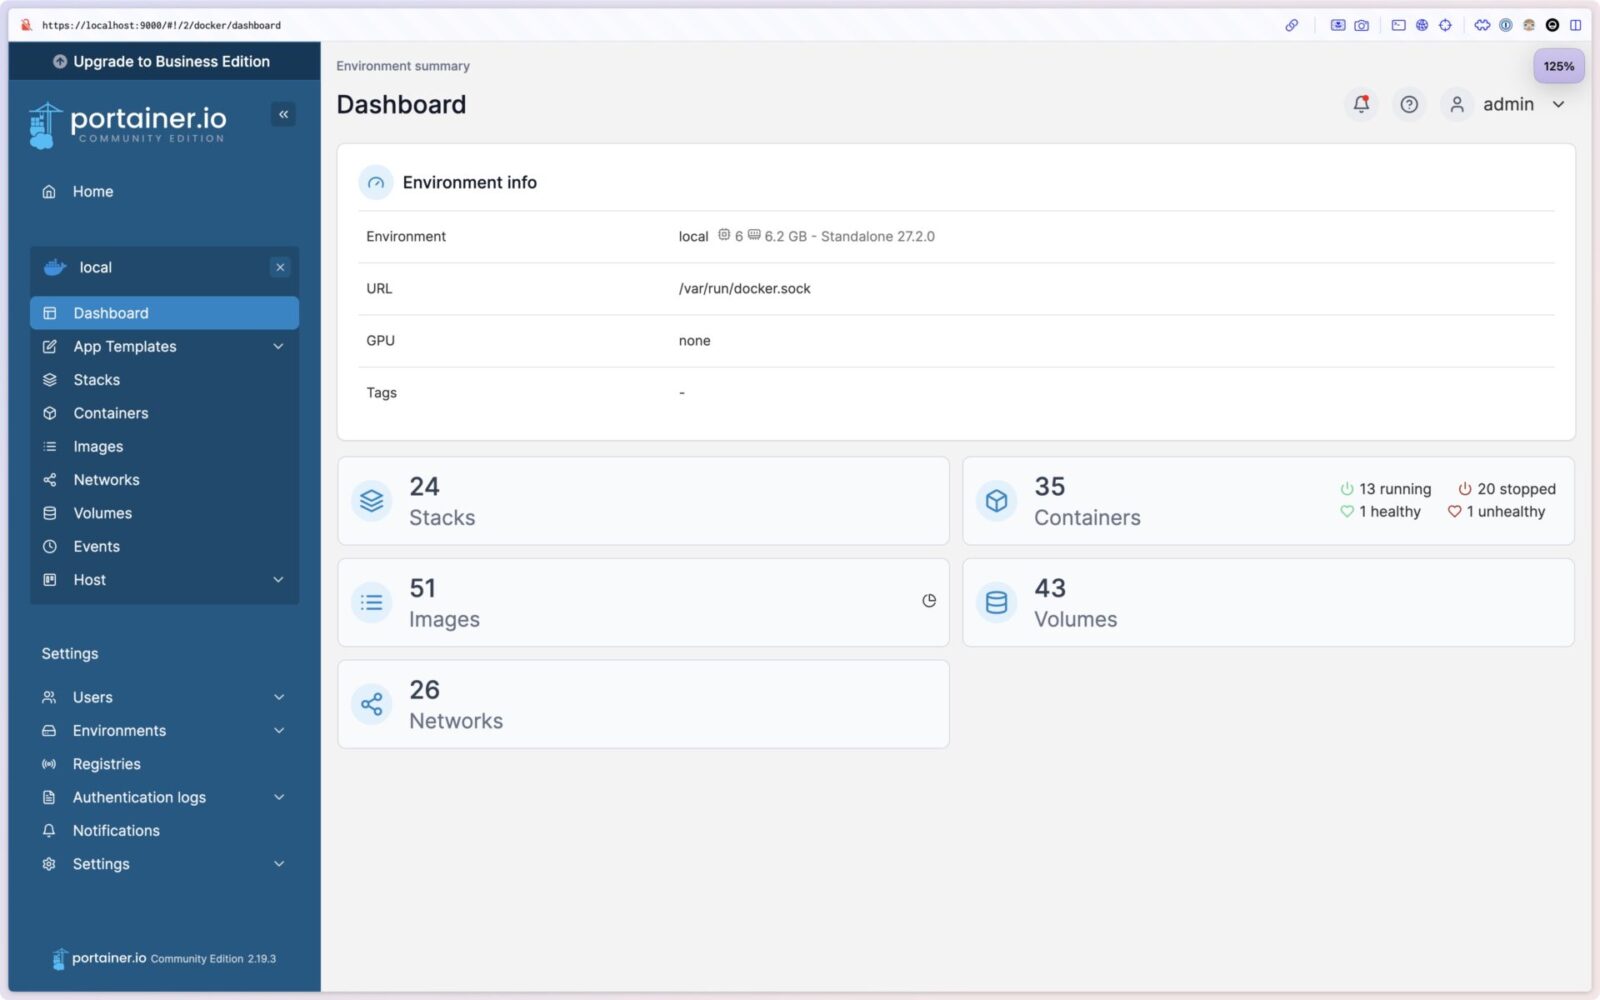
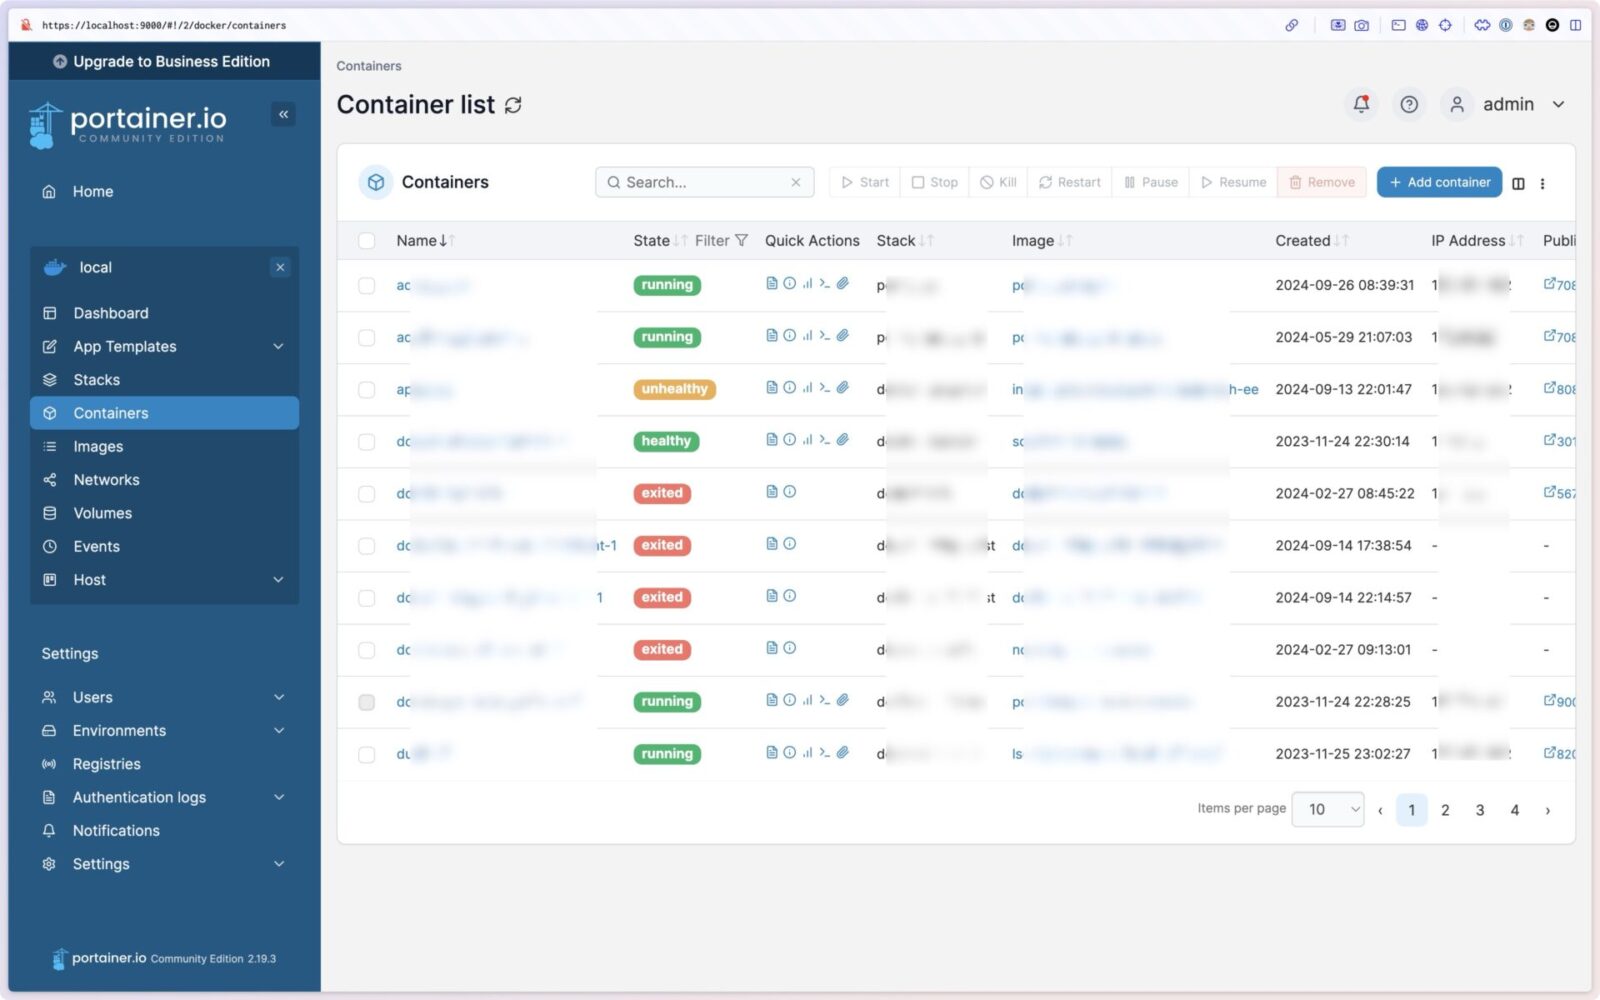
Portainer’s web UI has pretty much everything you need to see and “do” for your stacks and containers.

Screenshot
Screenshot

Secure Access

I use Cloudflare zero trust to expose my portainer (and other private apps). As simple as pointing a subdomain to a port using a tunnel, then saying Zero trust that any network request to that subdomain requires Zero trust authenticated session.

Portainer Gitops

Let’s get to the juicy part, the magic factor for portainer: gitops integration. It’s not rocket science, but it’s the most important “need” when hosting your own apps.

Certainly, if you are managing code, like templates, extensions, plugins, or basic stuff like your configuration files for an app’s server environments (like *sql, redis, node, php, nginx).

This makes your simple projects also closer to “Infrastructure as Code” practices, without going through complex AWS, Azure, IaC models.

Assuming you are keeping them in a VCS, favorably github, you treat your git flows (i.e: merge of a PR to a certain branch) as the main triggers for your deployments.

Portainer comes with native gitops integration through both webhooks and polling (not recommended but can be used as a backup method). When there is a push to a branch you define, portainer re-runs your stack, builds your images if needed then restarts your containers with the changes. 🎩

Screenshot

Portainer is open source (zlib license) and free with Community Edition. It also has more advanced features in its Business license. I found a few areas that I wished had those advanced features but so far none of them became “blockers” in my use cases. I imagine using portainer for more team-wide/company-wide use cases may require Business license.

At some point, I wanted to find a truly open-source and non-profit version of portainer and there are a few, but portainer (and its gitops integration) makes it a good enough combination that I didn’t want to bother replacing it.

Check it out https://www.portainer.io/

dotfiles method to sync your command line configurations between machines

I want to talk about a common practice among developers who work on multiple machines or work on (many) servers. As developers, we spend a healthy amount of our time on the shell and work with command line tools. If you fit in this description, it is important to configure your shell to your own liking.

Then comes the question, of how to keep this configuration in sync between devices or servers. I will talk about the common method called dotfiles to store, push and pull the changes of these files (or collection of them). You may be familiar with this method but I’ll talk about my own setup after giving some context. I hope you can find bits and pieces of helpful tricks I implemented on my own version. But you can search dotfiles in github and find thousands of other developers to explore different flavors of personal configurations. Most developers make these configuration files public. You can find my dotfiles repo here: https://github.com/mfyz/dotfiles

Configuration Files

Most of the command line apps we use save their configuration in the user’s home folder as a single configuration file or a folder with a dot prefix which makes the files/folders hidden by default file browsing apps and commands.

This makes the configuration of each tool, extremely portable. Basically copying this file between machines will give you exact replica of your tool configuration everywhere. Well, almost always. Some tools may require additional activation steps like installing vim plugins or planning multiple files.

How to collect them in one place?

The main trick of this method is to keep the original files under a single folder, generally

.dotfiles

in your home directory:

/home/myuser/.dotfiles/

Then link the original files to their final locations. Instead of manually linking them we’ll be using a utility for this.

Then this folder can be git managed and pushed to a remote repo. As I mentioned, a lot of developers make their dotenv configurations public. So you can push your dotfiles folder to github privately or publicly. If you are publicly pushing, you need to make sure there is no secure tokens included in your dotfiles. Read Security section below about this, that I’ll be talking about how to separate your secrets and store in a private repo that you can also make similar dotfiles-secrets repo and replication process between machines.

How to restore them to the right place in a new machine?

We’ll be using a utility called GNU Stow. Stow is a simple command that simply links files under a folder to your home directory. For example, if you have one or more configuration file for your zsh configuration like

.zshrc

file, you put it in a folder (can be any name) like “zsh”. Then running the command

stow zsh

anywhere will link the contents of zsh folder into the home directory.

You can collect all apps configurations in different folders under your .dotfiles folder. Then run stow for each folder. Or instead automate it something like:

for d in $(ls -d */ | cut -f1 -d '/' | grep -v '^_');
do
    ( stow "$d"  )
done

Further more, you can automate the whole installation steps:

  • clone the github repo, so you have local copy
  • install gnu stow using the operating system’s package manager
  • walk all directories and run stow command that will link files to the root folder.

The final installation script will look like this:

#!/bin/bash

if [[ -e /etc/debian_version ]]; then
    OS=debian
elif [[ "$OSTYPE" == "darwin"* ]]; then
    OS=macos
elif  ! command -v stow >/dev/null 2>&1; then
    OS=notfound
else
    echo "Please install stow manually then try again."
    exit
fi
if [[ "$OS" = 'debian' ]]; then
    sudo apt-get install -y stow
elif [[ "$OS" = 'macos' ]]; then
    brew install stow
fi

git clone <https://github.com/mfyz/dotfiles.git> ~/.dotfiles
cd ~/.dotfiles || exit
for d in $(ls -d */ | cut -f1 -d '/' | grep -v '^_');
do
    ( stow "$d"  )
done
echo 'Congrats, you are done, Enjoy!'

Securing your secrets

It’s very important NOT to push your secrets/tokens that generally make its way to rc files like .zshrc, or .bashrc. Instead, we will be moving all token/secret export commands to a separate file and repository that you can privately push and sync between machines with a similar method.

I’ve been using the name dotfiles-secrets for my repo and the name of the script.

The way it works is simply to put a folder

.dotfiles-secrets

then place all exports of tokens and secrets to a shell file called

secrets.sh

and push that to a separate private repo. Then git clone that repo manually to your home folder.

In my regular .dotfiles repo, my shell rc file (I use zsh, therefore it is

.zshrc

file for me), we have the following block that checks the

.dotfiles-secrets/secrets.sh

file and executes if the file exists.

# secrets
SECRETS_FILE="$HOME/.dotfiles-secret/secrets.sh"
if test -f "$SECRETS_FILE"; then
  source $SECRETS_FILE
fi

This way, we gracefully do not give any error if you only want to clone the configuration files and not have your secrets.

My process of doing macOS clean (re)install twice on Intel and M1 Macbook Air – In search of better performance and clean start

by Remy_Loz
by Remy_Loz

Before I upgraded to the new M1 machine, I was having a lot of speed issues with my previous Intel Macbook Pro. A month before giving up and buying a new M1 MacbookAir, I suspected that the macOS installation and apps/tools I installed over many years were perhaps the sources of the speed issues. I backed everything up and planned a clean re-install on the Intel Macbook Pro. End result is not seeing the speed lift I expected and finally giving in to buy a new M1 Macbook Air which has been amazing as far as the speed I wanted from my computer.

I wanted to write about my process of perfecting my process of setting up a brand new machine (or a reinstalled OS) as quickly as I can with restoring critical tools’ settings I use often.

Here is the todo list I created for myself for this whole operation:

  • Make Lists of Applications
    • Make List of homebrew packages installed
    • Make List of npm packages installed
  • Backup application configurations
  • Make List of git repositories
    • Push all repositories
  • Push .dotenv and .dotenv-secret
  • Backup SSH keys (also onto 1password)
  • Backup all .env files
  • Backup to (SSD)
    • Application configuration folders
    • Development folder
    • Home & Library folders (tar)
  • Backup ~/.config ~/.aws and similar credentials files/folders

Backups

I use an external SSD disk to store my backups. I actually take regular backups with a script I created. As simple as plugging in the SSD disk, run a bash script, and all done in under 5 minutes and I’m usually done.

Here is the script I run: https://gist.github.com/mfyz/087379eb77ec8581b665e234de238ee1

Things I do regular backups using this script:

  • App settings (~/Library/Application Support)
  • Dropbox content x2 (Personal + Work)
  • Development folder
  • Databases

Can you live without these tools you were using before? Or can you find open-source alternatives, or better paid alternatives?

Before installing any new app. This is actually a great opportunity to re-evaluate your relationship with all the tools/apps you use daily basis. Breaking digital habits is hard. Especially if you have everything set up already. But clean install is probably the best time to re-evaluate how much value each app is bringing to your day-to-day and the cost of using system resources on your computer. I have asked the same question and tentatively came up with the following list to use alternatives of the apps/tools I was using. A surprising amount of them had open-source alternatives so I could support the open source community as well as not need to pay or worry about proprietary licenses of the apps I was using.

Day to day tools

Installing Usual Tools

Using homebrew + using cask to install usual tools. Here is the partial list of the apps I installed with just running the following command:

brew install --cask zoom
brew install --cask android-studio
brew install --cask charles
brew install --cask docker
brew install --cask grammarly
brew install --cask imageoptim
brew install --cask little-snitch
brew install --cask miro
brew install --cask krisp
brew install --cask noun-project
brew install --cask postman
brew install --cask robo-3t
brew install --cask skype
brew install --cask transmission
brew install --cask transmit
brew install --cask tunnelblick
brew install --cask virtualbox
brew install --cask vlc
brew install --cask zoom
brew install --cask jdiskreport

Keep in mind that this will take a long, download and install all apps. This is a great way to document the apps you use that can be

Alfred

I use Alfred extensively. I have tons of keyword shortcuts web URLs that launch chrome with a few key taps in Alfred search. Some are query-based searches. I also have a ton of script and keyboard shortcuts configured as workflows. I even store my code snippets in Alfred so they are kinda universal through apps and computers. All mac apps’ configuration is both backed up and restored in a generic way, where all the specific application settings are residing under ~/Library/Application Support base folder. Each app has its own folder there and data/settings structured in their own way under these folders. I generally back up these folders in my regular backups. I simply restore the application I want to copy settings from my old mac.

Development apps/tools

Bash, aliases, ZSH, dotfiles

I manage my shell environment configuration and the configuration of the tools I use in the shell using a practice called dotfiles. What it means is a lot of people share their shell configuration files publicly in github with help of a few open-source tools that can easily link the configuration files in the right places.

You can find my dotfiles repo here: https://github.com/mfyz/dotfiles

I generally don’t use the install script and manually clone the repo in new machines and manually run the install script. The script itself is pretty plain and simple. It clones the repo locally to .dotfiles folder in the home directory and loops through the folders and run “stow” command which links the files under each folder to the related shell application’s configuration paths. Stow knows almost all shell applications target locations and create symbolic links of your files to the target locations. So you continue editing your ~/.dotfiles files and keep pushing your changes to github (or any other VCS) over time.

Dotfiles can include any file actually but here are the famous ones that help me ground up a brand new shell environment with a couple of steps. I often use this approach to configure an SSH environment I’ve given access to on a server that I will be working on more frequently.

  • bashrc or zshrc
  • my aliases
  • shell configuration files (for go-to tools like vim, tmux…)

I also include a few cheatsheets of keyboard shortcuts or commands for tools like vim for myself.

Running install script doesn’t get everything 100% set up. Or for certain environments, I don’t want to install some of the tools. So for those tools, I have a few more scripts that does the setup work for me.

SSH settings + Keys

I always manually back up and restore my ~/.ssh folder where I have both ssh configurations as well as all the keys I store on my machine. Most of the keys are backed up to 1password (more than half of them are shared with the team).

[/private]/etc/hosts file content

I use MAMP Pro to manage my LAMP stack apps and apache/mysql installation. So hosts file is generally automatically populated. But when moving to a new machine I always try to keep a copy of the hosts file so I can easily refer to the hostnames I was working on and the ones I want to restore manually.

iTerm

Same as Alfred configuration backup and restore.

CLI Tools

Almost all of my CLI tools are either in homebrew or npm. Homebrew is a popular package manager for macOS. A macOS without homebrew is basically a naked tree. I install almost every developer tool through homebrew. After setting up homebrew, the second thing is to set up nvm (Node Version Manager) and with help of nvm, install a recent/latest node and npm on the machine. There are also a lot of CLI tools I use are basically open-source npm packages. This makes installing these tools super easy. Before I did a fresh install on my Intel Mac, I did document all the global packages and picked the ones that I really use frequently and that become a long command that I ran to install all the tools I was using. So once it’s documented well, installing the packages becomes very easy.

Not so fast on M1! 🙂 I faced various issues on M1 not only nodejs but all around. I didn’t buy my M1 chip MacbookAir right away. I waited some time to transition to M1 because I knew it will be painful for a lot of tools to not fully support M1 and worse, have a lot of issues. My experience was not bad but pretty much every single thing I wanted to install had some workarounds to get it installed right on M1. So you can find yourself trying to search and find what other M1 owners faced on these packages. It may be dependencies you almost don’t care but you will have to deal with, in order to get a tool you need that depends on it.

Dev Environments

I try to keep my development set up as plain as I can. Also, the nature of my job allows me to be picky and also be able to consolidate my stack. In the last 4-5 years, I was able to get away with the following when I needed to set up my development environment:

  • Web / Back-end
    • Nodejs
    • LAMP (using MAMP Pro)
  • Mobile
    • XCode + Android Studio
    • Ruby / Fastlane
    • Cocapods

Mobile Studios – XCode + Android Studio

XCode is pretty seamless to install. Also, you will be asked and installing xcode developer tools very quickly when you need to install things like homebrew. So that’s all covered.

I don’t actively develop Android apps but I do the test and have some code that I still contribute. So I have to install the Android development environment. I have to say Google made Android Studio tons better to allow setting up an Android development environment very very quickly. Comparably same with XCode. What takes time on the Android side is to pick and download the right SDK, APIs, device emulators, and often each project uses its own Gradle and build tools versions.

After the base tools, setting up iOS Simulator and Android Emulator configuration is something to keep in mind.

I often pick a mobile project for both iOS and Android and try to get them build and run, to make sure everything is ready for my local mobile development work.

I separately also get a react native project up and running. Once the Xcode and Android studio are set up, it’s generally easy to get a react native project up and running quickly. Although I had to deal with some M1-specific issues it was very very easy to tune things up and make sure they work well on M1.

I also noticed both iOS simulator and Android emulators run really really fast on M1 chips. As far as build times, Xcode is visibly fast, Android by default not different but with a few tweaks, I was able to get it twice as fast compared to an Intel machine. It was surprising to see that speed on M1 side.

VSCode

Getting VSCode restored was relatively easy but not straightforward. I am using the Settings Sync extension which is 3rd party. As of writing this article, VScode still does not fully support settings sync natively (although it’s there but it’s in beta/experimental state and it’s not doing a good job compared to the 3rd party plugin). But the 3rd party plugin I use worked well to restore all settings. Although it failed to install the extensions I was using.

Lucky me, I exported the list of extensions I was using and I was able to manually install them in 15-20 mins.

I used this thread to get the list of extensions I had installed on Intel machine:
https://superuser.com/questions/1080682/how-do-i-back-up-my-vs-code-settings-and-list-of-installed-extensions/1452176#1452176

Sublime Text

I also use Sublime for simpler note-taking and quick editing purposes. The backing up and storing process is the same as the other generic macOS App settings process. See Alfred’s section above for more details on how.

Database connections

I use Table Plus as my database management tool on Desktop and iPad. To export and import all connections (except the ssh keys for the connections behind SSH tunnels).

Here is the help document for Table Plus for exporting and importing connection configuration: https://docs.tableplus.com/gui-tools/manage-connections#export-and-import-connections

Restoring/re-pulling local working copies of the projects

const fs = require('fs')
const path = require('path')
const { execSync, spawnSync } = require('child_process')

const runCmd = (cmd) => {
try {
const res = spawnSync(cmd, [], { shell: true })
return res.stdout.toString()
}
catch (err) {
return false
}
}

const root = './'
const ls = fs.readdirSync(root)

const results = []
ls.forEach((dir) => {
if (fs.lstatSync(path.join(root, dir)).isDirectory()) {
const result = runCmd(`cd ${path.join(root, dir)} && git remote -v && cd ..`, { stdio: 'inherit' })
const gitRemote = result && result.split('\t')[1].split(' ')[0]
// if (gitRemote && gitRemote.indexOf('ship.nomadinteractive.co') > 0) {
results.push([
dir,
(gitRemote || '-')
])
// }
}
})

console.table(results)

.env files

Making sure you backup all of your .env files while you take backup of your old mac. This is probably the most important when you need to restore your local development environment. Documenting and pulling your code from the CVS is the easy part. You will need to re-create from scratch or use the .env files you backed up. Constructing the right credentials again would take extra effort if you are not organizing your credentials in tools like 1password.

Design apps/tools

I use Figma, sketch, Balsamiq, adobe photoshop and Pixelmator. All of these have to be installed manually since some of them require multiple-step license activation.

Automatic Dark Mode switch on apps

This is becoming more and more a natively supported capability for most apps but a few of them still don’t automatically switch and/or have a way to set separate themes for their light and dark appearances.

VSCode Auto Dark Extension:
https://marketplace.visualstudio.com/items?itemName=LinusU.auto-dark-mode

iTerms Auto Dark Mode Switch:  
https://gist.github.com/FradSer/de1ca0989a9d615bd15dc6eaf712eb93

Alfred:
I use an Alfred workflow does the automatic theme switch, to install: npm install --global alfred-dark-mode

I hope these would give you a good reference point if you are considering doing a full/clean install or bought a new mac and looking for ways to quickly set things up. I also have most of these documented that I refer to them occasionally.

How to use Genymotion for Android testing (simulator/emulator) on macOS or Windows

If you are in mobile development, particularly Android development, you probably heard or used Genymotion’s simulator.

Genymotion is a company (and product) that run Android OS on a virtual machine to simulate android runtime with some basic apps the naked OS comes with. By default, it doesn’t have Google services and APIs installed or enabled but it can be installable on top of the naked Android OS you install from the images you can pick and download from genymotion’s repository easily.

These days, the official android emulator is not bad at all, but back in the day, it was terribly slow and difficult to do certain things. It was also designed solely for Android app developers who can do stuff from the command line to supplement android emulator. In those days genymotion was a superior simulator that was everybody’s first choice of running android apps while developing because of those reasons.

Aside of android app development, I extensively used genymotion to do my mobile web tests in native chrome for android and few other browsers. Today there are many services we can use in the cloud and test our web work in so many real devices and OS/browser version variations that this use case is no longer valid. But I still like the idea of an easy to configure and run android environment when I need. And for this purpose, I suggest Genymotion be one of the best solutions out there. They changed their licensing model a lot, so I don’t know what’s the latest but I was able to use genymotion (and still is) use freely for personal use cases (which is all of my use cases are personal projects and stuff).

Genymotion-player-3.0.jpg

 For some time, I also used genymotion experimentally to run a custom size tablet, installed google services and APIs, and google play so I was able to install the apps I use on mobile platforms that have a nicer user experience than their desktop or browser counterparts. If you don’t mind spending a lot of RAM, this can be an interesting option to run mobile apps on your desktop. Not super intuitive to navigate with mobile gestures with a mouse and trackpad, but one can get used to it very quickly.

https://www.genymotion.com/

I used Windows10 temporarily for my work setup for 10 days after 10+ years of being apple ecosystem user – It was better than I expected…

I used windows from it’s 3.1 version to pre-vista years – early 2000s. Then switched fully to be linux person for years in between before switching to mac around 2007. Since then have been apple fanboy, owning, using and geeking about apple hardware and software. But coming from other OSes, I’m not like people started their computer journey with easy-to-use apple devices. So I know there is more out therefor having more “control” and “customization” on your digital everyday space. I also worked as custom computer/hardware builder for years in my early years of converting my hobby to my profession. I also wasn’t too distant to “what in computer” question.

iPad Pro experiments

Years after living comfortably in apple ecosystem, after starting to experiment with extreme portability of a powerful device like ipad pro (see https://mfyz.com/digital-nomads). Seeing its limitations, there was always a geeky desire to own/create a super-portable work environment with me at all times. I achieved this to a degree in my experiments with various devices in last decade. Closest I got was with ipad pro with some outside help.

At the end of the day, it’s still not fully fledged operating system that responds to what I need. I talked about this in my recent articles and me trying to find alternative solutions that will work with iPad.

Microsoft doing things right lately

I also mentioned this in my previous writings that I occassionally finding myself browsing and configuring microsoft’s Surface Pro. I really believe microsoft started to do a lot of things right in it’s recent years management as far as company strategy, it’s investments on -especially- on open source community. Now I see they are doing some good things on the hardware front. I still find the quality is not match with apple hardware but I definitely see the lack of craftsmanship on all brands producing hardware that is designed to run windows operating systems. Among them, microsoft’s own hardware definitely stands out. Of course with price. But if you are using your computer exclusively for work and if your work requires exclusively a capable computer, then money is not a problem. It’s an investment. Powerful, better, comfortable, better…

1570471615_1510035.jpg

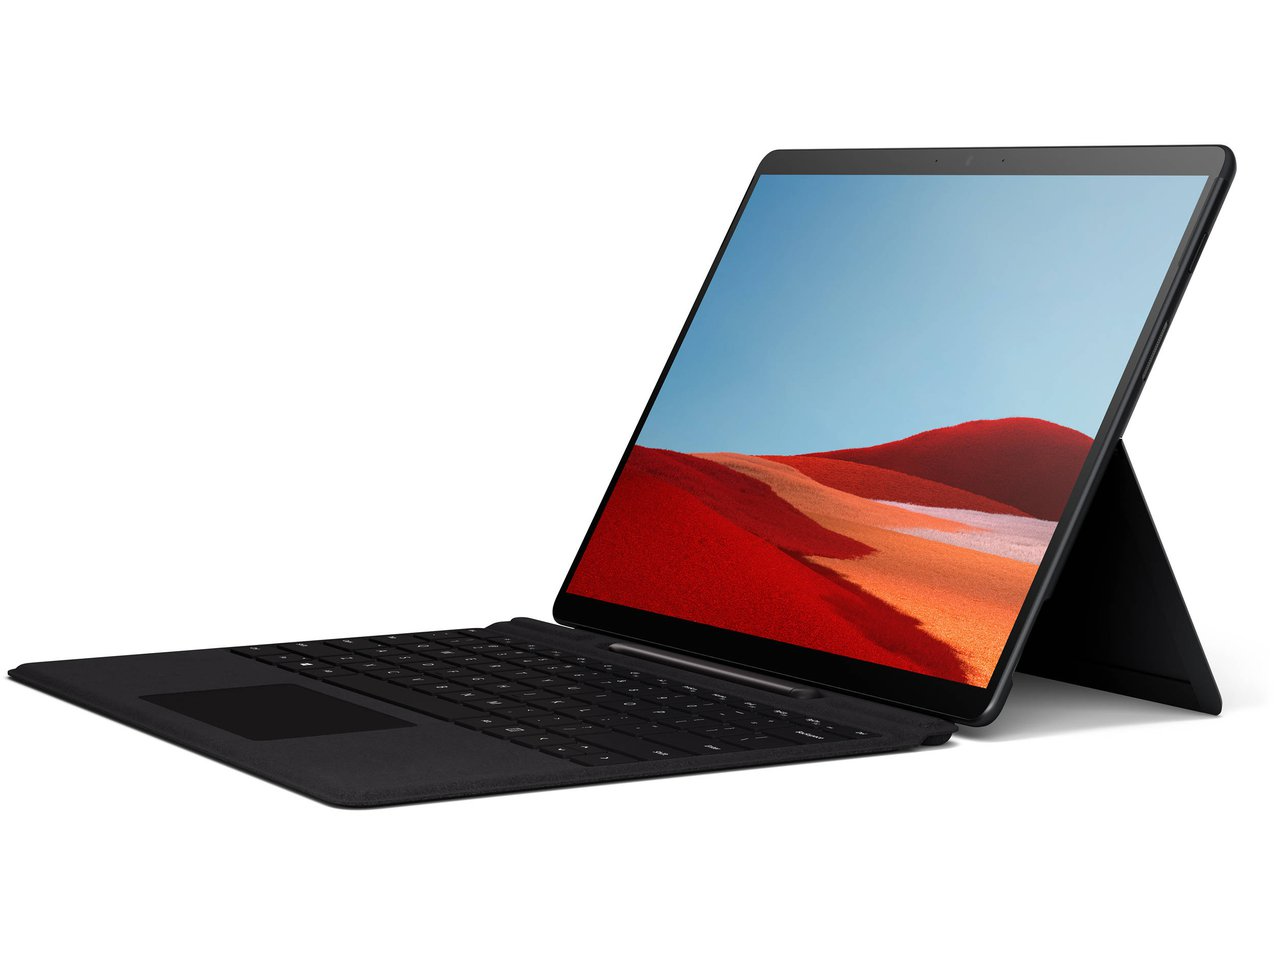
I really like Surface family devices. Both surface book and surface pros are nicely designed, well built and some configurations are really powerful machines that has the best portability/mobility factor.

An alternative path for me: Give Windows10 a try for 10 days

I found myself occasionally bid on pre-owned surface pro devices on ebay. But I never went too high to pay also because I still hesitated how comfortable I would be living on Windows10. I was wondering that question more than paying for pricy experiment to get a surface pro and see it myself. Instead, I bought an external SSD that I really like and got windows 10 pro license for dirt cheap and hit the road to install the windows 10 on the external SSD. Because the SSD is crazy fast through thunderbolt port I use on my macbook pro, I didn’t feel a thing in performance as if I installed windows 10 on macbook pro’s internal hdd. This gave me great comfort that I can restart on mac, unplug ssd and live my macOS life if I decided that windows 10 is not for me. So how did the experiment go?

Migrating my work life from macOS to Windows 10 was very easy

I thought I would have to re-adapt almost all apps I use every day. Result was different, I was already spending most of my time on team coordination, meaning communication tools we use were the primary tools I had to see if I get same precision on macOS. Almost all the apps are browser or electron based apps like Slack, Trello, Jira… So almost zero difference happened on this side. Only thing was bummer is that there is no great email client as you have many on macOS. Outlook is probably “the best” email client on windows. And even with outlook, there were so many holes you have to fill. I’ve been using spark on macOS for many years now and I was super excited to see they are working on windows version. Although nothing in the horizon yet. So it may be years until that happens.

Development Environment

Development environment was much better and faster than I expected. I really loved the idea of subsystem. Windows Subsystem for Linux (WSL) that had almost all distributions to be installed and run within a virtual machine that is managed by windows OS itself. Brilliant. 

0_MzyrfKl3evUM6NZP.png

So you have pretty much ubuntu subsystem running on windows almost without any issue. It went great to set up my zsh scripts, aliases, nodejs, python and other packages super fast. Until I realized, when running some apps like visual studio code, started from command line that runs separate nodejs threads inside WSL that may not be 100% optimized to run with the local filesystem. Windows is continuously working on to improve this as well as vscode team (Microsoft again) also has some remedies in vscode to overcome the integration painpoints. But I hit a weird high cpu usage issue that was discussed online, and looks like closed/solved in github issues but still receiving comments from people like me reporting the issue still exists. All in all, great development set up with little shortcomings that can be addressed or adapted easily.

I also found most of the tools I use that were already open source tools that were pretty much cross platform OR tools that commercial but had cross platform client apps (like TablePlus for database client).

Design Tools

The last and the one of the most important one was design tools topic. We exclusively use “figma” in Nomad Interactive in last few years now. It was Sketch before and that was a dealbreaker macOS only app. Figma being browser based and has so many extendability through a plain and nice “javascript” api makes the tool completely compatible on almost any OS that can run a capable browser engine like webkit. Other than that, I had few photoshop files that I rarely need to open. I can subscribe adobe to get photoshop installed on the windows machines in few hours – we worked on windows machines on our design tasks 10 years ago. Assuming Adobe still investing good deal of effort to have it’s suite running on windows platform, that shouldn’t be a problem when needed.

Continuity is a lacking big on windows platform when you use other devices – not just iOS but also Android too. There is almost no connectivity between your mobile device (phone/table) and your desktop OS. Apple started this and after last few OS versions, they kinda perfected it to a level that we don’t see it until we lose it. For example, I got used to receiving my SMSes (not iMessage, the actual SMS I get from the bank) and only need to use my computer to check the SMS and copy paste the OTP I received from paypal when I’m trying to login on my mac. It’s a very subtle but became very important micro feature between my mac and iPhone to be communicating between each other smartly. There is also other things similar to this.

But I went back to macOS after 10 days

Why? Because I had to rewrite a lot of other things under the hood – like my keymaps, like a lot of shortcuts I learned, optimized and perfected over the years. I also don’t want to invest any time to research and re-learn new apps and new ways to do the same thing I’ve been doing in last 10+ years. Like sending email in few keyboard clicks. 

I’m feeling less adventurous and more comformist on my wok setup. I don’t want to spend my precious time to learn the basics or re-adapt. But I’m ok to spend hours on improving my efficiency for doing X. Doesn’t matter what it is.

I can survive – I can buy a surface pro now

My primary work/life station will remain apple eco-system. But I know it’s not as difficult as I assumed to have same/very-similar tools to live life happy in windows even after spending a decade exclusively living on apple ecosystem. I know surface devices are the best portable devices designed until apple gives up the resistance of not having hybrid working OS that runs desktop-class apps on their ipads or have macbookpros to be more like 2-in-1 style devices.

Taking long (scrolling content) screenshots on Mac

Sometimes we need to take a screenshot of a long content mostly from scrolling applications. Most common example of this is full-length web page screenshot. There are chrome extensions we can use for taking full-length website screenshot. But there is not an easy way to take screenshot from other apps like native desktop apps or email content from mail clients.

XNip Screen Capture Tool

We can use Xnip Screen Capture tool that has all of the common screen capture software features and a feature We can use for taking long content screenshots called “Scrolling screenshot”

It’s is a freeware with upgrade ($2/yr subscription) but works perfectly for this purpose without the upgrade (it leaves watermark that can be cropped easily if needed).

http://xnipapp.com/

http://xnipapp.com/scrolling-capture/

https://itunes.apple.com/us/app/xnip/id1221250572?mt=12

iPad and Apple Pencil best works with Notability app

I was very skeptical about styluses for many years, especially over a screen. Closest thing was Wacom’s Cintiq and that was a giant monitor. The reason that styluses weren’t compelling is because they were laggy and never felt great to draw on screen.

Even with Apple pencil, it is still not great. But very very close. I owned pretty much all iPad models and versions from the very first release (I got a limited edition back then). And I’ve used Apple Pencil from it’s first debut but wasn’t convinced and also rejected the new gadget because it wasn’t Steve Jobs way. But I can totally understand it’s value from the educational standpoint – not art (at least not yet). The first release wasn’t necessarily laggy but you can definitely feel it’s tech side of it. There is only one thing you’re looking at a pencil, and that is the feeling has to be real because you’re dragging a pointer on a virtual paper.

With the latest iPad Pro 10” version, with screen refresh rate going much faster, now you can definitely feel it’s very very close. With the software support and not being paranoid about hand touching screen while writing or drawing, it definitely gets very close to the real thing. Unfortunately I’m still seeing many of the drawing and note taking apps are having the lag it had from 60 refresh rate old screen. I don’t know why it still has that.

Notability is the one app that I’m feeling very comfortable to draw and create stuff with it. My use cases are still a lot of ideation, super low fidelity wireframing, some planning work. I love the output feels truely non-techy creation but it is in fact a digital creation.

Sometimes we udnerestimate the value of not having boundaries when we think. Even including the requirement of typing our ideas or words on a keyboard being a restriction to our mind. I started this back-transformation with using more and more moleskines than taking notes on my phone.

I like Notability app because it’s very simple and plain app with few extra features that I like. You can link your dropbox, google drive accounts to backup all notes in PDF format that becomes very handy when you want to draw some stuff and open in your computer very quickly.

Super Affordable Cloud VPS: Scaleway

Recently I have been having performance issues with few personal sites that I was hosting on my small Digital Ocean instance. I was using 2vCpu, 2gig ram instance costing me $10/month + 30gb disk for extra $3/month. To be honest this is a very very cheap personal server to have and host few sites as well as doing minimal software tests and playing a good proxy/vpn when I need it.

I have installed New Relic, Datadog, Pingdom and linked them to my personal slack account to have everything monitored and reported seamlessly. I’ve been getting CPU and occasional memory alerts mostly because of my wife’s blogs that is getting much higher traffic than my sites. Even with that traffic, it was making me feel the performance that I supposed to get from that server wasn’t as consistent as I wanted.

A new kid in the block

A few weeks ago I started going into cheap ssd vps hunt again and I saw many more players in the game including Amazon Web Services’ Digital Ocean killer. I compared many services and wanted to find something more stable and reliable. But I found a very very new and smaller company utilizing raspberry pi like ARM based hardware in greater scale for this small to medium size VPS services called Scaleway. Although the CPU architecture as “server” is foreign to me, I was getting curious. One of the differentiator factors for Scaleway is because of the initial and maintenance cost of the hardware, the costs of equivalent instances to be ~5 times cheaper. This means I can get 3-4 times more powerful machines with the same minimal monthly cost I’m spending for Digital Ocean or similar services. Scaleway is definitely pushing hard on the $5/mo SSD VPS game.

The main question was and remains “how reliable this new French startup for a permanent VPS need?”. This is obviously a risk but for me, it’s an easy risk to take because I mastered to set up and migrate web and database servers in many years with bare minimum servers as well as with cloud services like AWS or Azure.

So I took the risk and moved to Scaleway in 2 hours with 2x size instance with pretty much half of what I pay which is ~$5/month. It’s been 2,5 weeks and I’m seeing no hickups or any issues so far.

You can explore the machine options and pricing for each architecture here: https://www.scaleway.com/pricing/